
There is something magical about capturing the snow as it falls and turns an ordinary winter photo into a scene from a winter wonderland. However, photographing a stunning snowfall image comes with its fair share of challenges. So if you are looking forward to recreating a realistic falling snow effect during post-production, we are here to help. With Photoshop as our tool of choice, in this tutorial, we will walk you through the steps of both how to apply a snow overlay and how to add the falling snow effect organically in your image. Let’s get started!
Note: These steps are only a starting point for creating snow in your images! We took each step to an extreme to show the possibilities but you can fine-tune as you go ahead to get the effect you want – from dramatic to subtle.
How to Add a Realistic Falling Snow Effect in Photoshop
1. Add a New Layer
 Image Courtesy of @dianenicolephoto
To start the editing process, begin by adding a new blank layer. Go to Layer in the menu at the top and select New, click on Layer, and press OK. The keyboard shortcut for it is SHIFT + CTRL + N. You can add a new layer by clicking on the New Layer icon (placed near the trash bin icon) present at the bottom of the Layers palette. Select the new layer and place it above the Background layer (which has your image).
If instead of a New Layer you are adding snow overlay, then follow these steps. First, save the Overlay file on your computer and then double click on it to unzip it. Now drag and drop it onto your image in Photoshop. You will see that it will appear as a new layer in the Layers palette. Those using a snow overlay can jump straight to Step 6 (change the blend mode of the layer) after this.
2. Fill the New Layer with Black
In this step, we will fill the newly added layer called Layer 1 with Black. To do this, select Layer 1, then go to the menu bar at the top and click on Edit, and select Fill. This will open up the Fill command dialog box. In the Contents section, go to Use and select Black as the fill color from the drop-down menu and press OK. You will see that the document window is now entirely filled with black color.
3. Add Noise

For those of you wondering why we are adding noise to this layer, it will later become our falling snow. To add noise, go to the menu bar at the top and click on Filter. From the displayed menu, click on Noise and then select Add Noise. This will open up the Noise dialog box. In the dialog box, drag the Amount slider towards the right side to add the noise anywhere between 145% and 155% (you can change the values if required). Then, select the Gaussian box and also click on the Monochromatic box. You will see that now the noise in the background has turned from RGB dots to black and white dots. After selecting everything, click on OK to apply the settings, and noise will appear on your document window.
4. Blur the Noise
To achieve a more realistic snow falling effect, we will add some blur to the noise. This will help in making the noise appear like snowflakes. Begin with this process by going to the menu bar and click on Filter, select Blur, and choose Gaussian Blur. This will open up a Gaussian Blur dialog box where you can drag the Radius slider to your desired value and press OK. Another way of doing this is selecting Blur or Blur More options under the menu displayed under Blur. Both provide the same effect, with the only difference being the intensity of blur in Blur More is more.
5. Use the Levels Command to Reduce & Brighten the Noise

Using the Levels command, we will reduce some noise from our layer to achieve a more realistic effect. At the menu bar, go to Image, and from the displayed menu, click on Adjustments and select Levels. This will open up the Levels dialog box. You will see a histogram in the box – it represents the color of the pixels present in the image between pure white and pure black. Just below the histogram, you will find three sliders – the black slider (on the left), the gray slider (at middle), and the white slider (towards the right).
Now, click on the white slider and drag it towards the left side till the beginning point of the slope’s right side. As you drag the slider towards the left, notice that the noise will get brightened up. Now to make the noise appear more like snowflakes, click on the black slider and drag it towards the right side until you get your desired result, and then press OK. As you move the black slider towards the right, you will find that areas of noise in your image will darken – reducing the noise and creating a falling snow effect.
6. Change the Blend Mode of the Layer

To view the effect you have created on your image, you will have to blend the layers (Layer 1 (or Overlay) and Background Layer) to block the black area to highlight the white specks. Select Layer 1 (or Overlay), and go to the drop-down menu (displayed at the top of the Layers palette) that is set to Normal and change it to Screen. As you do that, you will see the black background disappears, and only the white specks remain over the image.
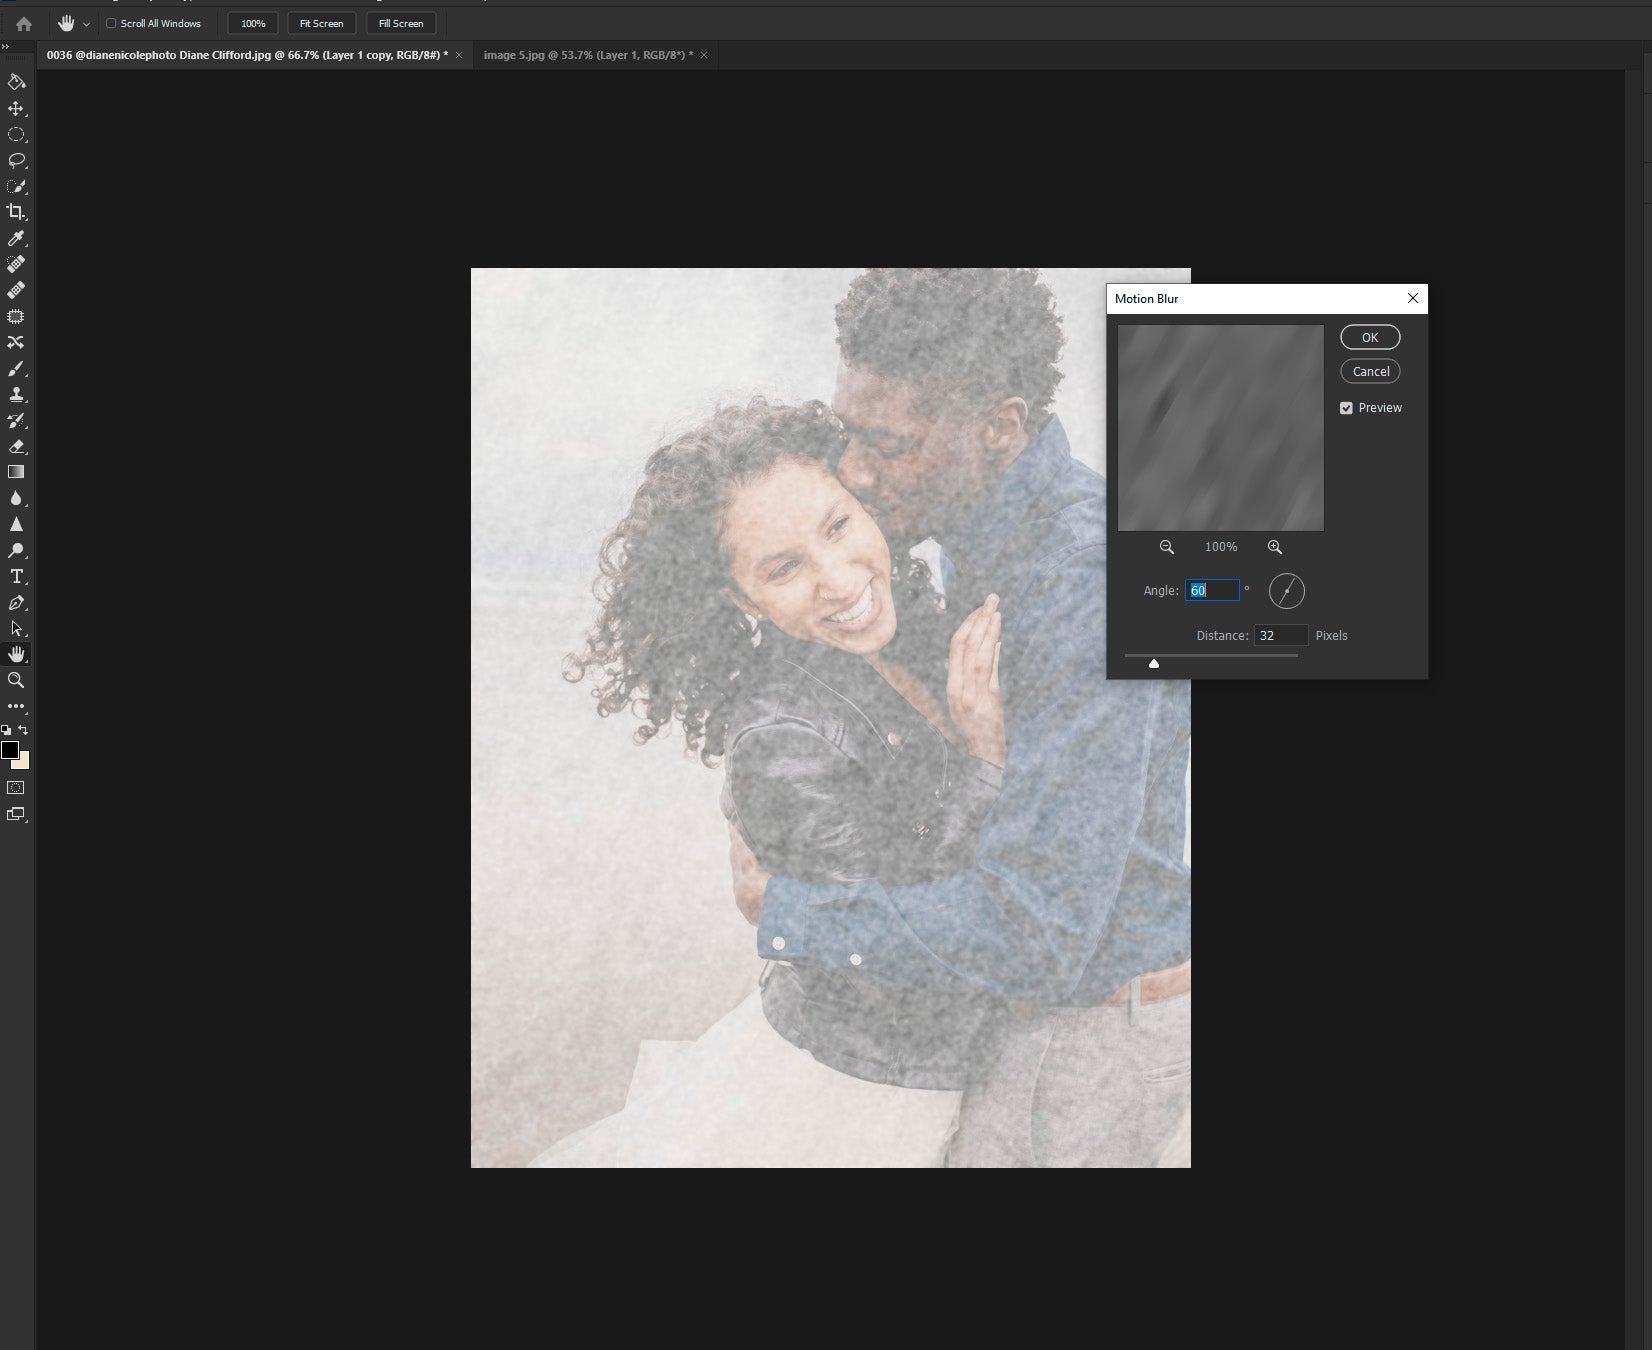
7. Apply Motion Blur
Even though your image now has white specks over the screen, they still don’t look like snow. So in this step, we will add motion to these specks using the Blur Filter. To do so, in the menu bar, click on Filter, go to Blur, and select Motion Blur. This will open up the Motion Blur dialog box.
In the dialog box, go to Angle and set the number to anywhere between -60° to -70°. This number denotes the angle at which the specks will appear to be falling from. Then, move on to the next option – Distance. This will determine the trail length of the specks. You can set it to whatever gives you the most realistic snowfall effect. After you have set it to get the desired result, press OK.
Related Read: How To Blur The Background In Photoshop In 7 Easy Steps
8. Duplicate the Layer

Now, the image will appear a bit more realistic and but not real yet. So to get there, let’s duplicate the current layer (or the snow overlay layer). To duplicate the layer, go to Layer in the menu bar, select New, and then click on Layer via Copy. The keyboard shortcut for this action is CTRL + J. Double click on this layer to rename it Layer 2.
9. Rotate the New Layer to Add More Snow
In this step, select Layer 2, go to Edit in the menu bar at the top, select Transform, and click on Rotate 180°. You will see that the specks will still fall at the same angle but are present at different places than Layer 1.
10. Use the Crystallize Filter to Increase the Size of Snowflakes
Now to increase the size of the snowflakes (specks) in Layer 2, we will use the Crystallize filter. To access this filter, go to Filter, select Pixelate, and choose Crystallize. This will open up the Crystallize dialog box. In the box, you will find an option – Cell Size – this is set to 10 by default. You can add the value that works best for you, and you can see the real-time result in the preview box. After you have added the Cell Size value you want, press OK. You will see that your image now has normal specks and some large white specks.
11. Again Apply Motion Blur
In order to make the larger white specks appear more like snowflakes in Layer 2, we will apply Motion Blur to them. So in the menu bar at the top, go to Filter, select Blur, and then click on Motion Blur. Again, the Motion Blur dialog box will open up. With the Angle set to the same value as in Layer 1, go to Distance and increase the trail length by adding a slightly greater value than before. Then, press OK and exit. With this, you will achieve a more realistic snow overlay effect.
Further Read: Best Photography Lighting For Cold, Rainy, Or Snowy Wedding Portraits

We hope you found this tutorial on how to apply snow overlay in Photoshop helpful and were able to achieve a realistic falling snow effect. Now that you know the steps, try experimenting with different images and settings and get creative. For more tutorials on Lightroom and Photoshop, check out our tips section. If you have any questions, feel free to reach out to us in the comments section below.
Here at ShootDotEdit, we love sharing resources that help you better understand various tools in Lightroom and Photoshop. We also help you streamline your post-production workflow by taking editing off your plate. Check out our pricing plans to learn more about how we can help.
Leave a comment