
With enough practice and some creative tricks, editing photos in Adobe Lightroom can be a simple and easy process especially with the use of Lightroom Presets! But sometimes, a preset can completely change the look of your photograph or doesn’t match your usual editing style. In this case, we’d like to introduce you to The Fader. If you are looking for a quick and easy tutorial on how to fade presets in Lightroom, then you have come to the right place! Read on to learn more about how to subtly get the desired mood and style for your photographs.
Lightroom Presets for Beginners
Before we dive into how you can fade presets in Lightroom, if you are a beginner to Lightroom presets, this summary can help you understand what presets are and how they can benefit you.
A preset in Lightroom is a group of settings that allow you to give your photos a specific look or style. When you install a preset into Lightroom and click on it while in the Develop module, those predetermined settings will automatically be applied to your selected photo. With just one click on a preset, you can alter your image in several ways and give it a completely new look. The alterations can be related to colors, shadows, contrast, and so much more. The benefits of using presets on your photos are the consistency, simplicity, and speed they bring to your wedding editing. You can even apply a preset to a photo and then sync the changes with all the other images.
Related Read: Importing Lightroom Presets
How to Tone Down a Preset With The Fader
Presets bring you a one-click unique style but sometimes, you might want to tone down a preset to match how you want a particular image to look. Adobe currently does not include preset softening as a built-in feature in Lightroom but fortunately, they did allow developers to build plug-ins that unlock new features. That’s where the Lightroom plug-in The Fader comes into the picture. The Fader lets you have total control over the impact of a preset on your photos.

The Fader plugin needs to be activated once you install it.
Installing The Fader
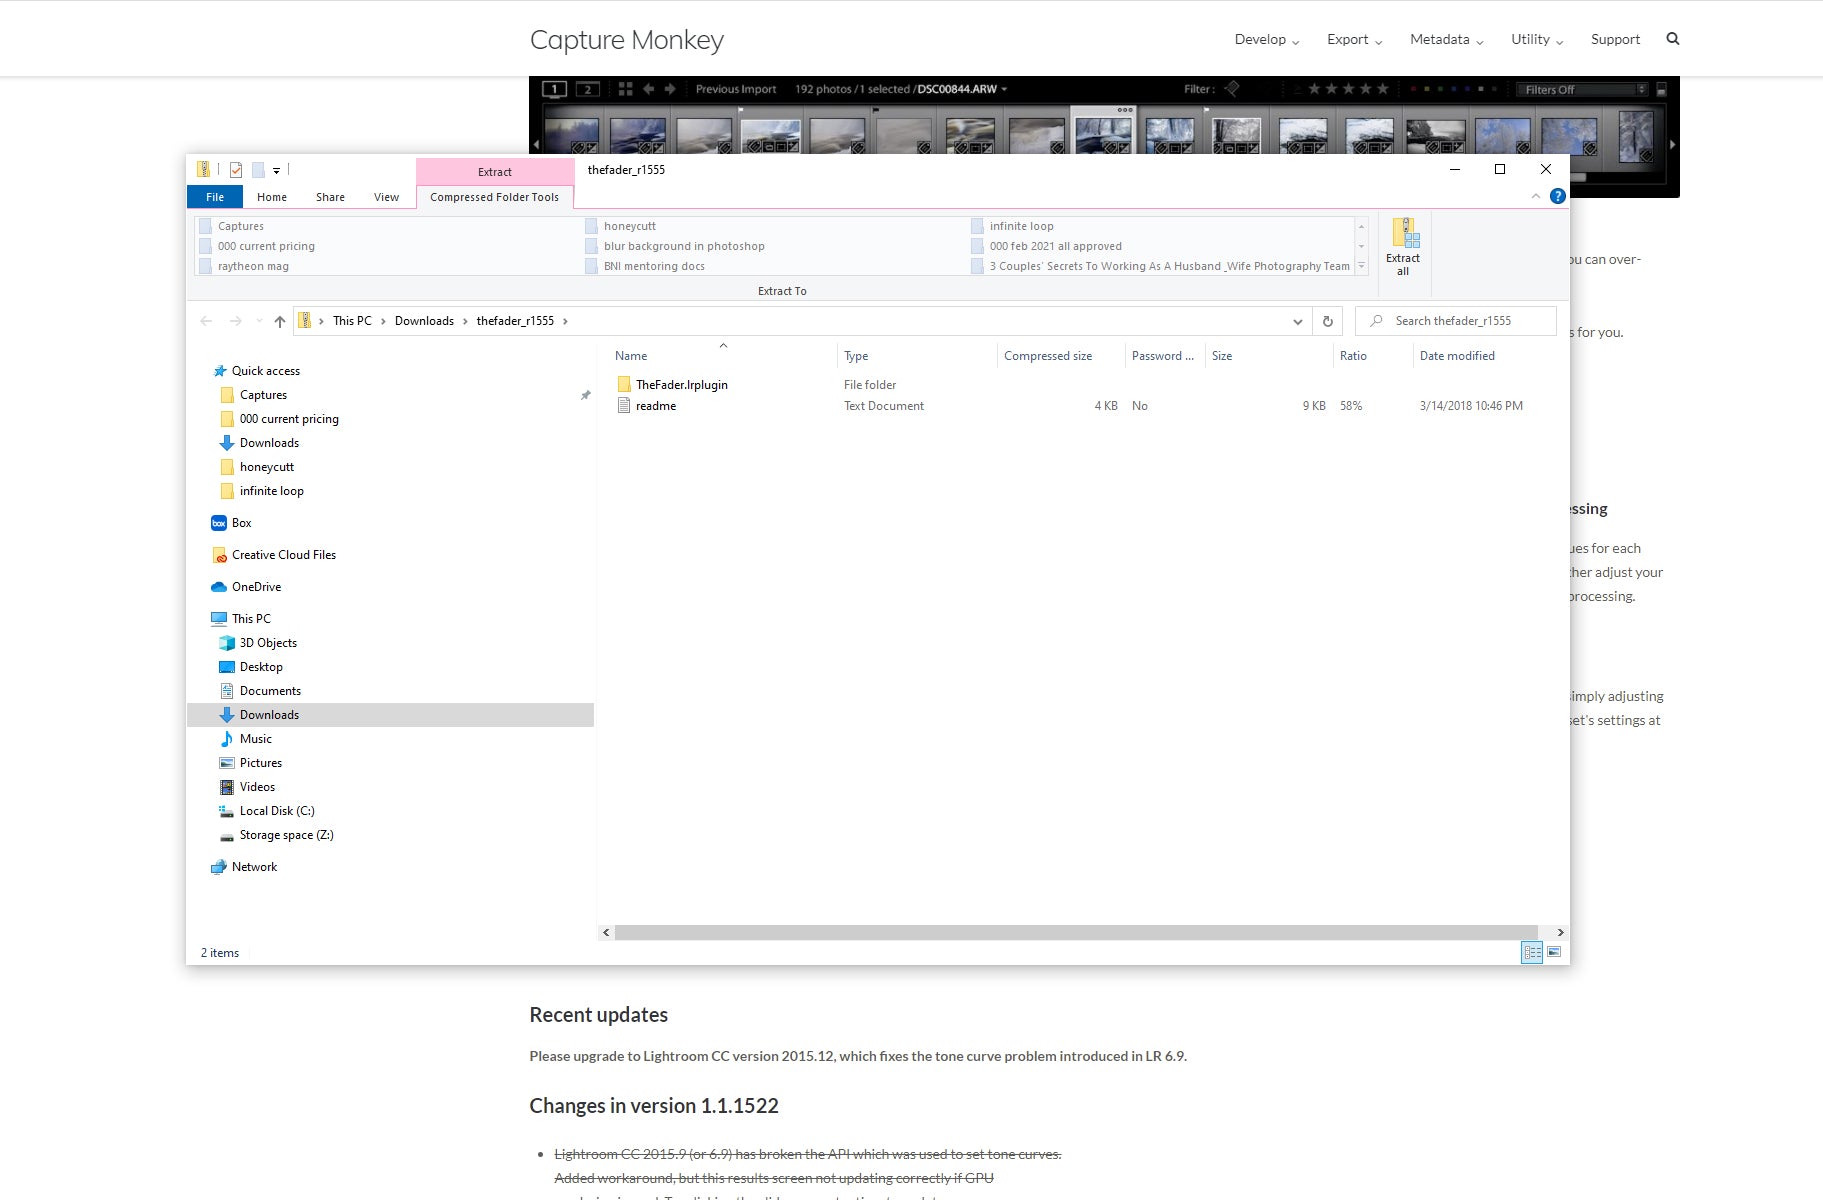
- The Fader plug-in can be downloaded online in a zip file. Extract the file, then move the TheFader.lrplugin to a folder. You can call your folder— Lightroom Plug-ins
- Now, launch Lightroom and go to the Plug-In Manager. In the bottom left corner, you will find the Add button. Click on it and go to the folder where you saved The Fader plug-in. In this folder, double click on the file The Fader.lrplugin. This will initiate the installation process.
Click on the preset you want to apply to your photo from the drop-down menu, and then use an Opacity slider to fade the effect. The Fader will calculate the changes the preset made to the image and fade them all simultaneously.
How to Use The Fader to Lower Preset Opacity in Lightroom
Once you have downloaded The Fader onto your computer, there are some simple steps that you need to follow to lower preset opacity for your photographs. Listed below are the steps you can take to use The Fader.
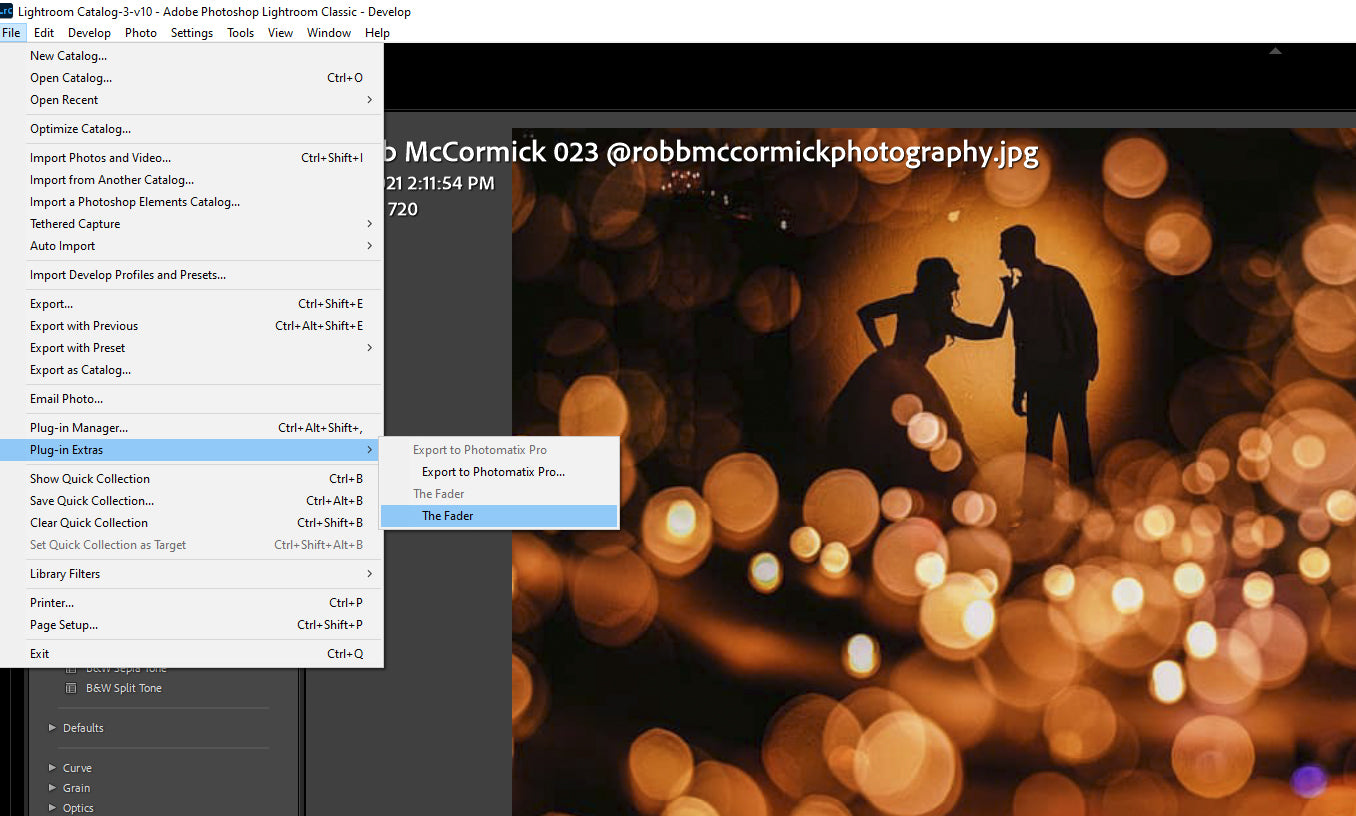
- To use The Fader to adjust the strength of your Lightroom presets, go to the File > Plug-in Extras menu. Choose The Fader from this menu. Now, you will see a new window pop up over your image. This means The Fader has started working
- There will be two main drop-downs in this window. The first is a Folder drop-down, which refers to the folders that your Lightroom presets get organized into. The other one is a Preset drop-down that lists all the presets available in your chosen folder
- Choose a preset, and you will see the effect applied to your image in the background. This preview will help you reposition The Fader window so that you have a full view of your image
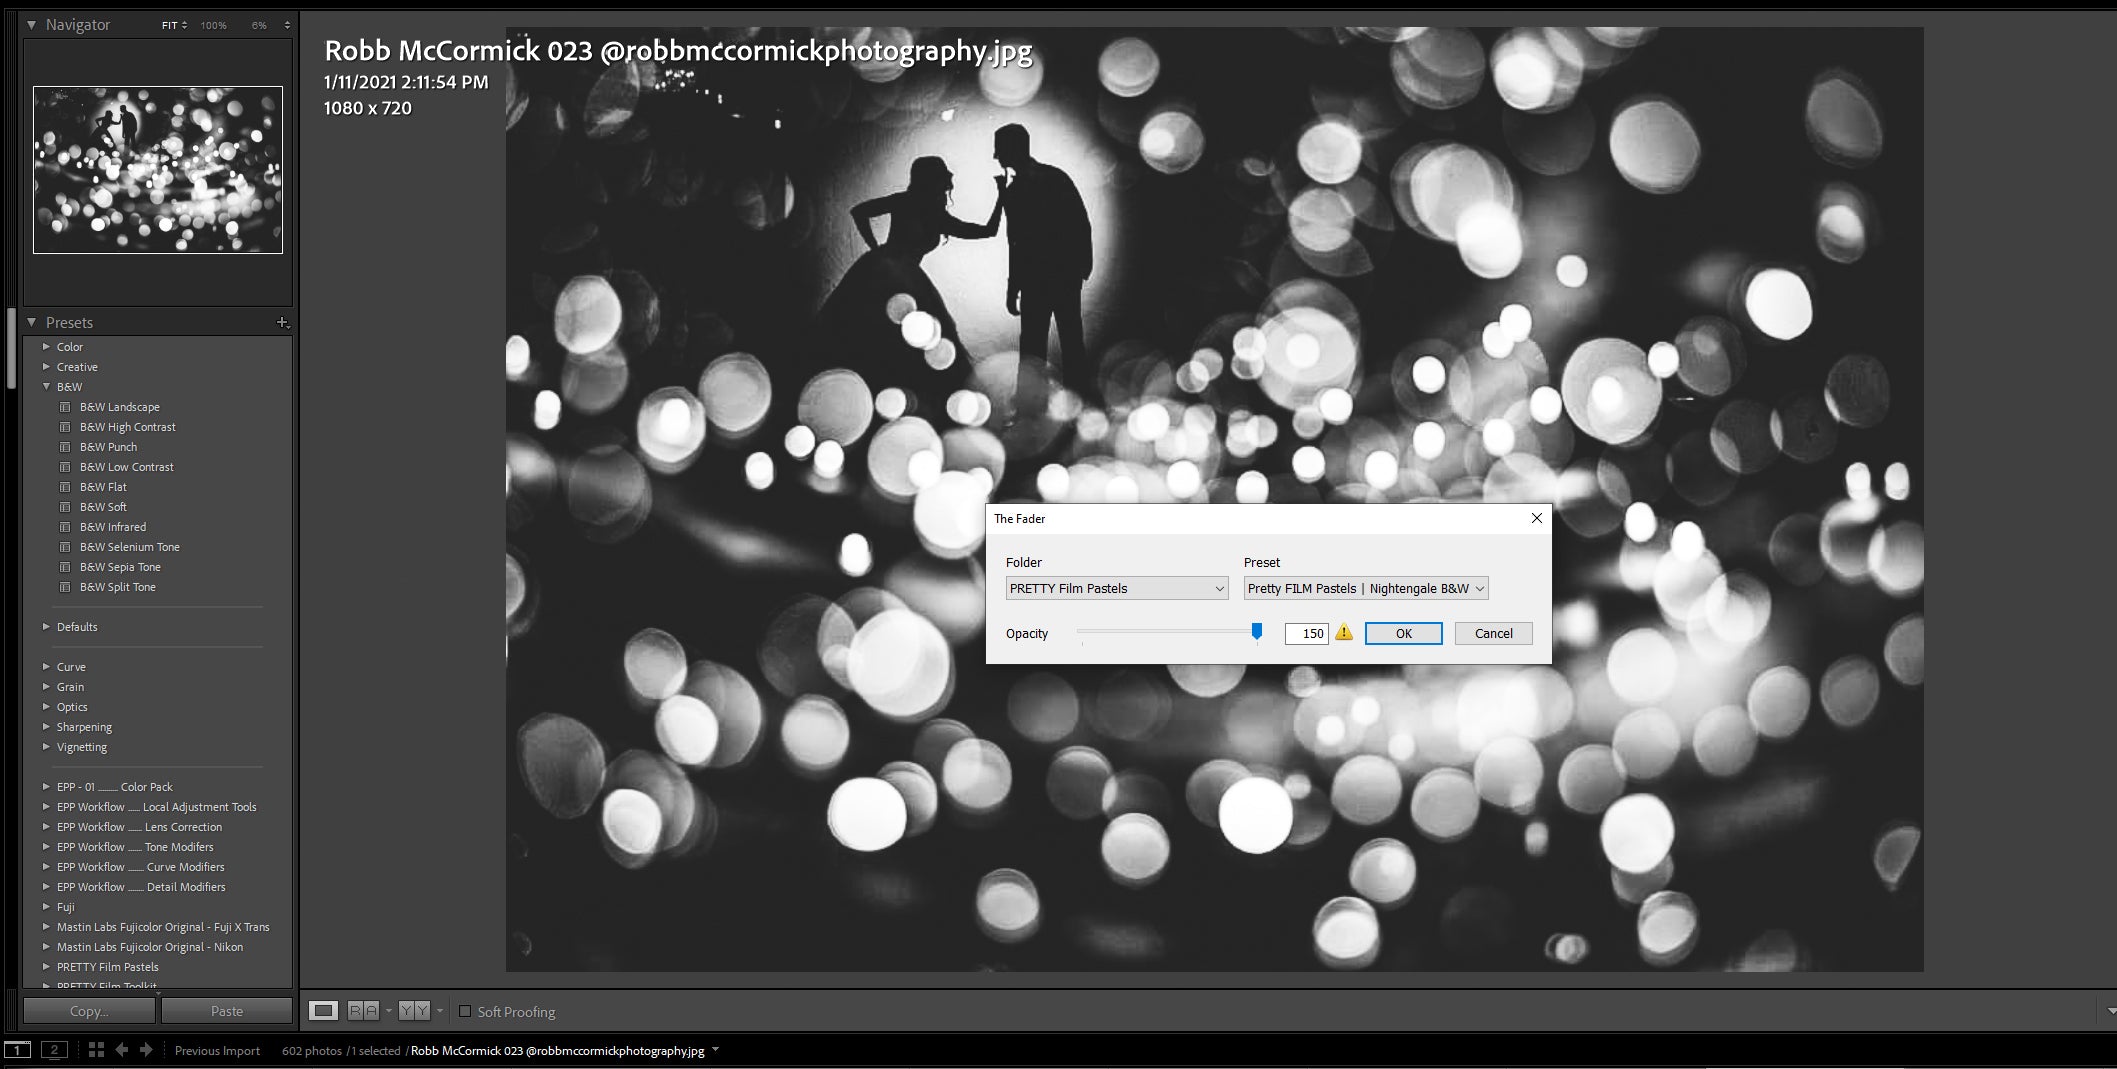
- Now, you can start adjusting the Opacity slider. Similar to what you would do in Photoshop, moving this slider to the left will decrease the strength of a preset on your image. You can keep adjusting it until you get the desired effect
- If you want to increase the effect of a Lightroom preset, you can just turn the dial above 100% in The Fader
- You can fine-tune the preset fading even further by adjusting or selecting other settings to apply to your photo. For example, if the preset you choose applies a grain or bokeh effect to the photo, you can get rid of that part of the preset by simply unselecting that option. Then you can use the Opacity slider to fade out the rest of the preset. In case you don’t like the effects, you can go back to your original image or previous edits using the History panel.
Further Read: How To Use Lightroom Presets
Besides helping you out with how to fade presets in Lightroom, at ShootDotEdit, we love bringing you new tips and tricks that help you work more efficiently. We also offer photo editing services so you can focus more on honing your skills. Check out our price plans to see the services we offer.
Leave a comment