
Sometimes, after taking a stellar photograph of your couple, you might realize that the alignment is wonky, or the building in the background looks a little tilted. But don’t worry, this is something that you can easily fix using a grid as you edit your photos during post-production. Grids in Photoshop help position the elements correctly while editing or designing a layout for your images. They are non-printing lines that float over your pictures and can also be displayed as dots, allowing you to maintain symmetry in your photos. In this blog, we will show you how to create a grid in Photoshop and ensure balance and alignment in your images.
7 Steps to Creating a Grid in Photoshop
1. Make a New Document

Open Photoshop and start creating a New Document. For this, you’ll have to select File and then click on New. You can also use shortcut keys Ctrl + N on Windows or Cmd + N on Mac. Next, you’ll have to set the document size (width and height) at this step. You can do so according to your monitor resolution or printing needs. Note that more pixels per inch (PPI) will result in higher resolution images and better quality prints.
2. Make Your Grid
Now, go to the View option in your toolbar at the top of your workspace. Then, click on Show and then select Grid. You will immediately see a grid pop up. The grid will consist of continuous or dotted lines. To have more control over how your grid will look and function, you can edit the appearance of these lines and subdivisions in your next step.
3. Edit Preferences

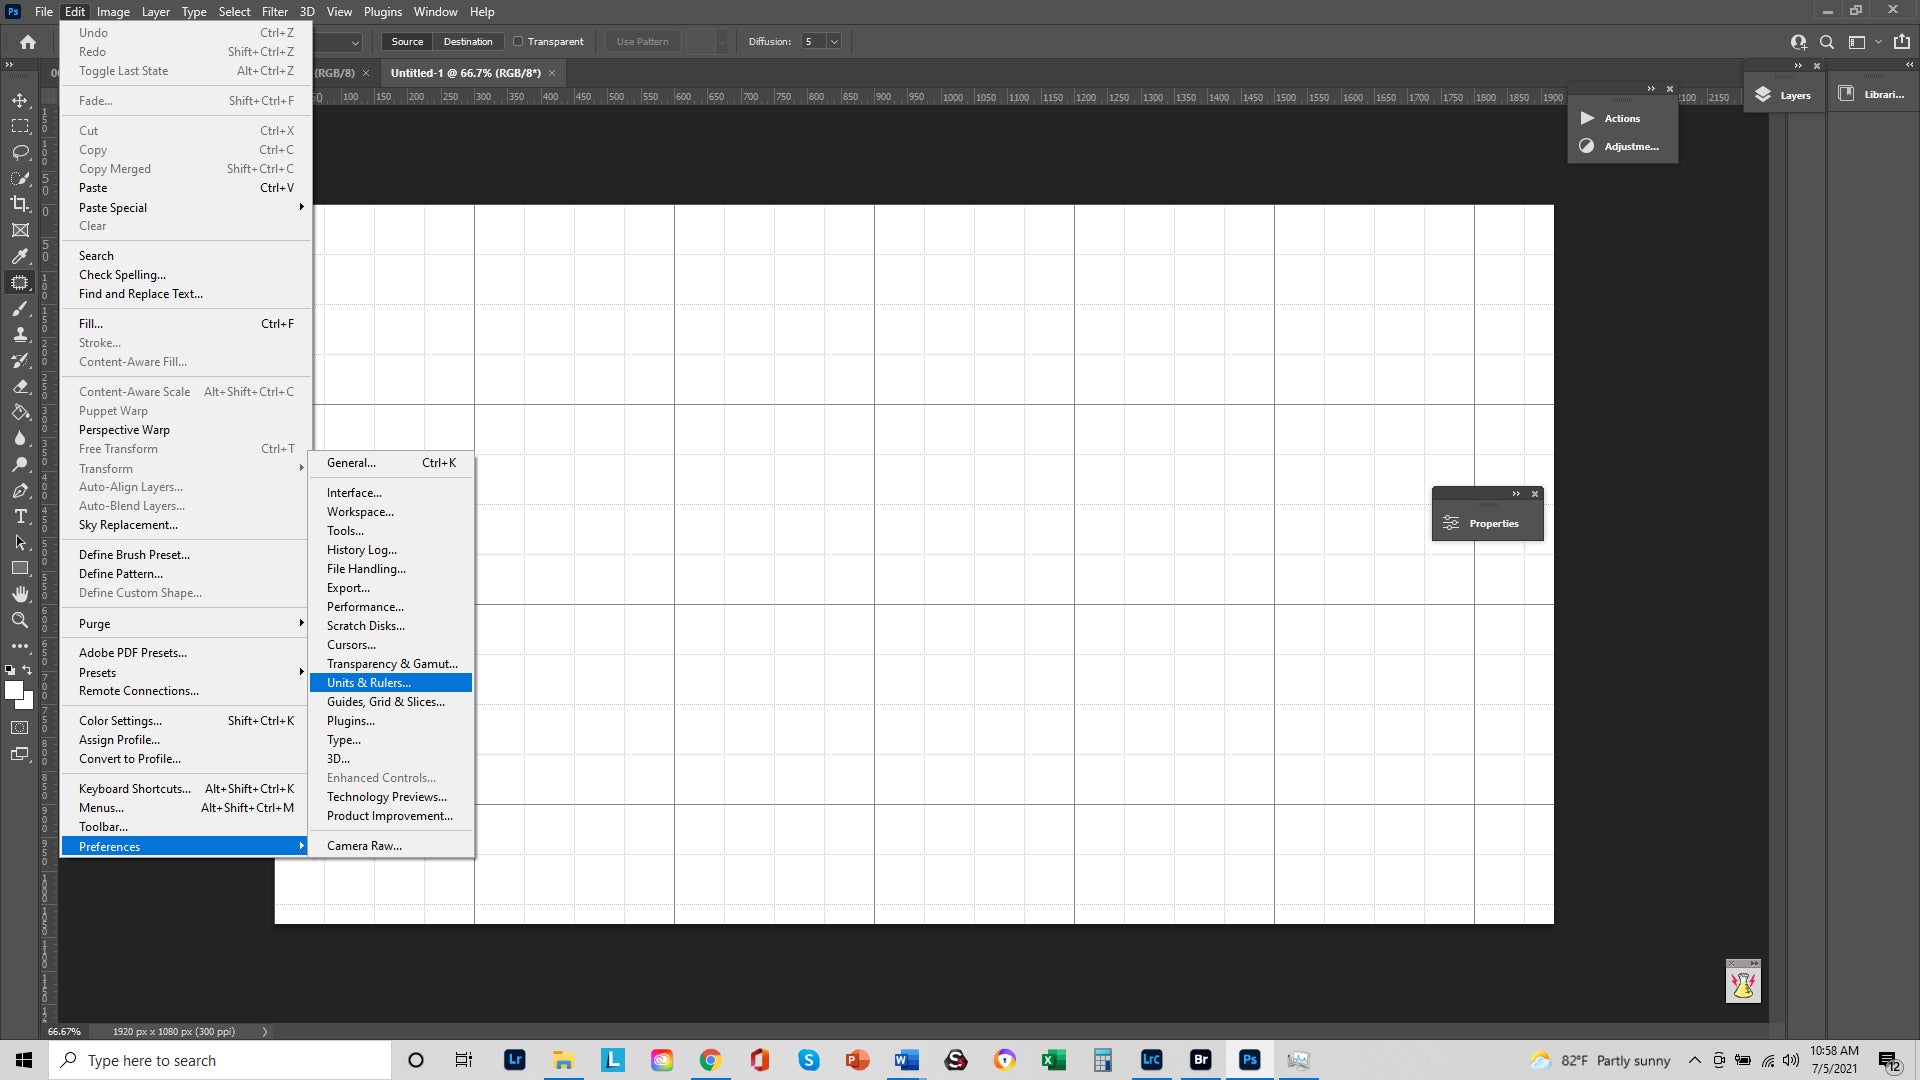
At the leftmost corner of your workspace, go to the Photoshop option, and from the dropdown menu, select Preferences. In Preferences, select Guides, Grid & Slices. You will now see a new window. In this window, you can set your preferences, such as a change in the color of your grid, the distance between lines in your grid, and the number of subdivisions you want between the main lines in your grid.
4. Snap to Grid
After setting your preferences, you can enable the snapping feature if you want Photoshop to help you place objects correctly. To do so, go to View and then select Snap to. From the side menu, choose Grid. After this step, you’ll notice that the objects you drag and drop into squares of your grid will click into place and snap to the size of your chosen square.
5. Create Shapes

You can also use your Photoshop grid to create shapes if you want. Go to Custom Shape Tools and choose your preferred shape. Grab the shape and drag it to the square you want. Then, release the shape. You will see it snap to the size of the square. Repeat this process for that row as many times as you wish. Once you’re satisfied, you can either duplicate it or move it to an entirely new area. You can do so by navigating to Layers Palette by choosing Window and then selecting the Show Layers option or just by pressing the F7 key on your keyboard.
6. Link Images to Shapes
A grid in Photoshop can also help you link an image to each shape you create. The first thing you’ll have to do is to choose the layer where you’d want to place your image. Next, click on File and then Place. Now, select the image and go to Layer. Click on Create Clipping Mask, and your photo will appear in the grid you’ve specified.
7. Save Your Photoshop Grid
Now that you’re done creating your grid in Photoshop, you can save it for your current editing session and even for future use. Just press Ctrl+S on Windows or Cmd + S on Mac, and you will see a save box pop up. You can name and assign your grid a file type while saving. The most common file types for grids are .TIF and .PSD.
Adding Guides in Photoshop
Besides using a grid in Photoshop, you could also use guides to align shapes and position your elements in an image. The difference between the two is that while you can use the same grid for all the pictures once created, you’d need to create a new guide for every image. Also, guides have one cool feature to them – the objects dragged to within 8 screen pixels of a guide get attracted to it and snap to it. This makes it very easy to align your objects precisely on the guide and not just near them.
To add a guide in Photoshop, you will first have to add Rulers. To do so, go to View and then choose Rulers. You will see two Rulers appear after this, one of them on the left and one at the top of your workspace. Now, you can change the Ruler preferences. Go to the Photoshop tab at the top left corner, then click on Preferences from the dropdown menu, and choose Units and Rulers. In a new window that pops up, you will be able to set Ruler preferences. Now, to create a guide, just click on one of the rulers and then drag a guide over your image or layout.
If you want to move a guide, make sure you select the Moving tool and then click on a guide before you drag to move it. After having created all the guides you want, you can lock them in their position. Go to View and click on Lock Guides to do so. Just like grids in Photoshop, you can also enable Snapping for your guides. For this, you will have to go to View, choose Snap to, and then select Guides. To hide the guides, go to View and then Show. Select Guides from the side menu to make them disappear or reappear. To remove guides after you’re done working with them, you can navigate to View and then select the Clear Guides option from the dropdown menu.
Suggested Read: How To Edit Portraits In Photoshop

Guides and grids in Photoshop can not only make your image editing work easier but also quicker and more accurate. We hope this Photoshop tutorial enables you to gain more control over your edits and bring out desired results.
At ShootDotEdit, we are passionate about helping you grow your wedding photography business. Besides offering helpful tips to help you hone your skills, we also offer photo editing services to lessen your post-production workload. To learn more about our services, you can check out our pricing plans.
Leave a comment