
As one of the last parts of the wedding day, the reception could be one of the more challenging events to shoot. With conflicting light and constant movement, it can often be difficult to quickly set up light and capture the best shots. So, how can you create light and document some of the most important details from the wedding reception? In the fourth post of her series, wedding photographer Leeann Marie shares her photography lighting setups and tips to help you work quickly through this part of the day. Keep reading to discover Leeann’s suggestions for lighting wedding reception details.
ABOUT LEEANN MARIE
One of the leading wedding photographers in Pittsburgh, Leeann Marie has created an exclusive brand that is family-focused for the cosmopolitan bride. She’s a national speaker for WPPI and has been in business for many years. She has a background in industrial engineering, giving her a unique perspective on photography and business. She relies heavily on systems in her business to accomplish all of her goals. She lives in the city of Pittsburgh with her husband and daughter. She loves looking out of her back window into the firefly-lit woods and enjoying a night out for sushi and drinks with friends. You can learn more about Leeann on her website and Instagram account!
PHOTOGRAPHY LIGHTING SETUPS

Welcome to the Wedding Lighting Master Class! We hope this article in the series by Leeann will help you to learn some valuable techniques for perfectly managing and lighting the different scenarios you will probably be faced with on a wedding day.
1. FAST IS BEST
“Fast Is Best” - yes, that’s Leeann’s first bit of advice for you. And we agree! Try to keep the lighting scenarios as fast as possible to ensure you move between scenarios quickly, while still creating beautiful images for your couples. While you could always use natural light, don’t be afraid of flash in the least and work with tools and an arsenal of mental notes to help you move between situations quickly and flawlessly.
2. THERE ARE OPTIONS

While you can light one simple scene in multiple ways, the methods outlined in this course are Leeann’s personal preferences, and we encourage you to try them and then modify them, if necessary, to fit your photography style and client needs.
Related Read: Wedding Photography Styles: ShootDotEdit’s Favorites
3. YOUR LOCATION PLAYS A ROLE
Leeann works in Pittsburgh, Pennsylvania, which is an area subject to rain on summer days, snow in April, and 80-degree sunny days in November, by her own admission! Like her, if you too are faced with varying weather conditions for every single wedding, then you might want to pay attention to adjusting your lighting according to the situation.
WEDDING RECEPTION DETAILS

In her first part of the wedding lighting series, Leeann covered bridal details and preparations, and how she lights them in a variety of situations. In the second part, she discussed family portraits, and how she lights them both indoors and outdoors. And in her last recent installation, she went through how she lights portraits (on a sunny day) of the bride, groom, and bridal party.
In this blog, she talks about another huge piece of the wedding day photos - the details. These are the photos that serve as popular pieces of Instagram feeds and reminders for your couple of all the hard work they put into designing their wedding day. Once the day is over, the only memory they’ll have of the small pieces of their wedding planning will come from you. On top of that, having great wedding detail images are important to inspire your future brides and grooms - always a hot ticket in today’s marketing techniques!
Related Read: The 30 Must-Have Shots From The Wedding Ceremony
PHOTOGRAPHY LIGHTING AT RECEPTIONS

Leeann’s approach to using wedding reception lighting techniques to highlight the details is to get them quickly, and beautifully lit. She also prefers her reception detail photos to have the same “feel” that the client was going for in their overall design of the wedding. These images are also key for some of the big vendors you might work with (florists, linens, lighting, stationery designers, wedding planners), and so in order to maintain wonderful relationships with them… well, these photos are also kind of for them, too! And, that’s what you can proceed with in your mind when you begin photographing wedding reception details. The second thing you could focus on are your reception venues. For Leeann, reception venues are often two types, which she covers in this article:
- Bright, sunny, lots of windows or outdoors
- Grand ballrooms, not a lot of natural light
If you’re not familiar with the venue, Leeann suggests swinging by before the event just to get a look at the “style” the venue brings and see how it aligns with your client’s wedding day aesthetic. This will give you a game plan of how to light details when the actual event arrives. Also, ask your client to tell you about their vision, so you can nicely match it. Are they looking for airy and romantic? Contrasty and vibrant? The more you know, the easier it will be for you to light the details and make quick decisions on the wedding day.
Lastly, practicing some of the photography lighting techniques mentioned in this article for wedding reception details will help you to move fast on the wedding day. Sometimes you might only have up to 5 minutes to photograph an entire room, and so you need to have a mental game plan ready of how to make the most of that time! For equipment, Leeann has her speed lights with her, but in bright, sunny rooms, she is more often than not shooting with natural light. Like Leeann, you could also have some go-to scenarios and some ways that help you mix things up a bit without having to move around. Let’s get into it.
Related Read: All About Natural Light Wedding PhotographyA PLAN TO PHOTOGRAPHING DETAILS
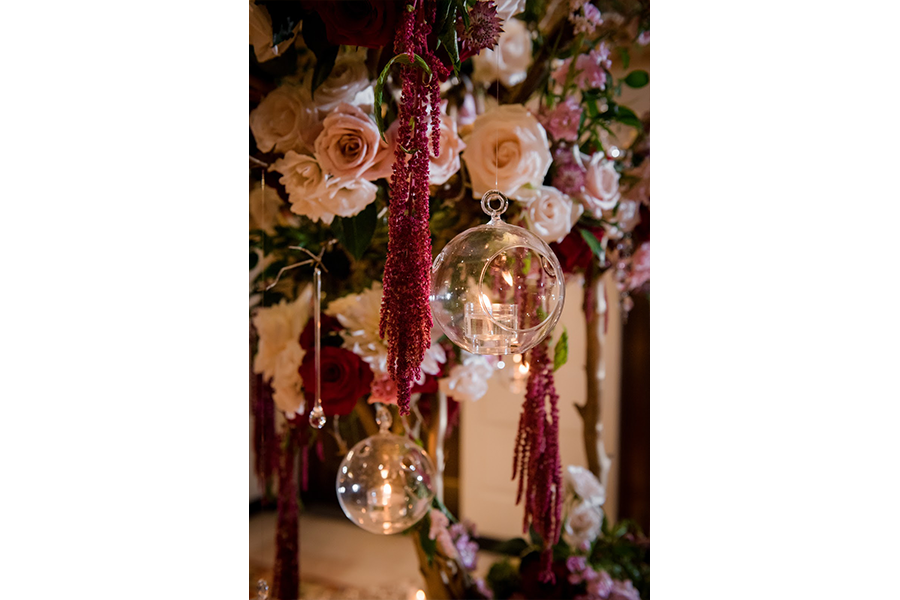 Image Credit: @leeannmarieg
Here’s a sneak peek into Leeann’s mental game plan for how she photographs details:
- Escort cards (if not touched yet!)
- Full room
- Centerpieces
- Full table
- Centerpiece vertically
- Up-close centerpiece
- Small details in a centerpiece
- Stationery
- Cake
- Within room (showing placement)
- Full cake
- Up-close details - Cake knives (especially if engraved)
- Linens
- Full table
- Up close w/ small details - Head table/sweetheart table
- Full table
- Champagne flutes
- Bride + groom place cards - Others: Dance floor, gifts, dessert table, gift table, etc.
BRIGHT, SUNNY, LOTS OF WINDOWS, OR OUTDOORS
Scenario: For reception venues with tons of natural light, Leeann typically photographs the details natural-light-only as well. Often, the client picks this type of venue for the airy quality, and so bringing in a flash at this point might not be really necessary, especially if you can move quickly without it.
Equipment + Technique: The first thing Leeann does when photographing each of the details noted above is to identify the main source of light hitting it. “I like to photograph my wedding details with the light coming at about a 90-degree angle to where I am standing. I find that this allows the detail to have lots of highlights and shadows, and really makes it ‘come to life’ in a photo,” says Leeann.

Image Credit: @leeannmarieg

Image Credit: @leeannmarieg
GRAND BALLROOMS, DARKER RECEPTION SPACES
Scenario: For darker reception venues, Leeann typically photographs the details with one flash. In this way, she “replicates” the idea of having “one window” by using her flash for that purpose instead!
Equipment + Technique: “The first thing I do when photographing each of the details is to get a reading for the ambient light in the room. Without turning on any flash, I set my camera to manual and adjust for settings that allow me to pull in some of the ambient light in the room. I also make sure that my shutter speed is lower than my flash sync speed (important when you add the flash in!) Next, I set up my flash, which typically consists of a single Speedlight on a Cheetah Stand and a MagMod Sphere. The Cheetah Stand allows me to move the flash around the room quickly, and the MagSphere softly diffuses the light to resemble that soft window light from the previous example. I keep the flash power bright enough to light the detail, but low enough to not seem overly ‘flashy’,” Leeann adds.
IT’S ALL ABOUT BALANCE
It’s all about selecting that nice balance, which is why Leeann likes to also have her flash in manual mode as well. Again, as mentioned previously in this article, how you set your camera and flash settings is a personal choice, but Leeann finds that shooting in manual mode helps her to control every aspect of what she is photographing and move quickly. She, then, places her flash setup at ~90 degrees between her and the detail, and starts shooting away! “I find that I can leave the flash in a single place around a table, and then move to capture all the important details quickly. Also (side note) be sure to move salt + pepper shakers, jars of butter, and sugar from the table when photographing. It just makes it look nicer. Sometimes I, too, forget this in the essence of time, but it’s just a nice add-in when photographing the details!” Leeann suggests.
Lighting Diagram:

In this photo, you can see Leeann’s light and how it adds to the detail of the room!

Image Credit: @leeannmarieg
ADDITIONAL NOTES ON PHOTOGRAPHY LIGHTING
Pin Lighting: What happens when you walk into a room and the centerpieces are pin-lit and the rest of the room is dark? In this scenario, you could sometimes try and light the rest of the table with a MagGrid+Sphere combination, but otherwise, you could quickly shoot the centerpieces and room by exposing the light on the centerpieces.
Additional Lights: If you have more time, we encourage you to play with additional lights in the room! One of the ways Leeann likes to do this (in a darker room) is by putting another light behind the detail for some additional drama!
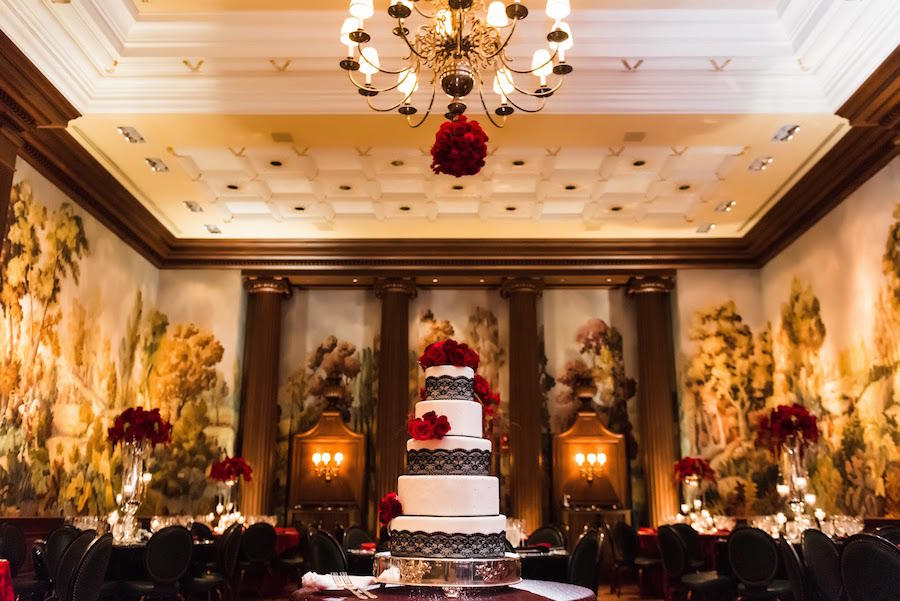
Image Credit: @leeannmarieg
For each piece of this master course, Leeann set out to identify the most common and most challenging situations that she has faced throughout her career. Again, if you are looking to create a wedding photography experience that is efficient, but also way above and beyond what your couple’s ‘photographer friends’ can do, you are at the right place! Try some of these tips. Study them. Modify them. Copy them. It’s all up to you. We hope you find all of these examples and ideas helpful as you go along your wedding photography journey. With these photography lighting setup techniques for reception detail shots, you will probably be able to quickly capture the images your clients will love. The more photography lighting knowledge you’ll have, the easier it will be for you to shoot in any location and in any condition. So, if you are looking for more lighting tips and tricks, you can check out our other blogs.
At ShootDotEdit, we are passionate about sharing tips, tricks, and ideas that can help wedding photographers like you grow as professionals and business owners. One of the other ways we love helping you is by providing professional photo editing services to free up your time - the time that you can dedicate toward scaling your business or enjoying some family time. To learn how we do it, you can check out our pricing plans.
Leave a comment