
How Does The Magic Wand Tool Work?

The Magic Wand tool in Photoshop can help you swap out the background in an image without making any changes to your subject. This wonder tool picks up pixels based on their similarities in color and tone in an image. Rather than looking for distinct borders, it scans the image for similar shades to make a selection. When you click on a part of your image with this tool, Photoshop will match those pixels with the pixels present in another part of your image. If you want to further refine the way Photoshop looks for those pixels, you could use the Options bar. However, there’s one thing you’d need to keep in mind while working with this tool – this feature might not work well on a gradient or blurry area in your image. That’s because the shades and hues in such parts of your image could confuse the feature, making it difficult for the tool to distinguish and determine the change in color and tone. So when is the tool most resourceful? In cases where images have solid, contrasting colors.
Magic Wand Tool Options You Should Know
1. Contiguous
The Contiguous option in the Magic Wand tool determines if the selected pixels are next to each other. This lets you limit your selection to a specific area or choose many sections across your image with just one click.
2. Tolerance

Tolerance simply means increasing or decreasing the sensitivity in the luminance values of a specific color. While the default Tolerance value is 32, you could go up to 255. At a value of 50, Photoshop will select luminance 50 shades darker and brighter than the part you clicked on. If you want to set the exact value of a particular tone, you may choose to select 0 as your Tolerance value.
3. Anti-Alias
If you want to smoothen the edges of your selection, you may choose anti-alias. This option makes the color transition between your selection and other areas of the image softer and smoother so that colors blend well and look natural.
5 Easy Steps To Use The Magic Wand Tool In Photoshop
1. Selecting The Tool
Open your chosen image in Photoshop. On the left side of your screen, click on the Magic Wand icon in the toolbar. That would be the fourth option from the top. If your icon looks like a brush painting a dotted line, then, right-click on it and choose the Magic Wand Tool.
2. Add to Selection
After you’ve selected the Magic Wand tool, go to the top of your screen to make sure that the Add to Selection mode is selected. This will look like two white boxes, and with this option, every time you click the Magic Wand on the image, you will be adding to your selection instead of cutting it down.
3. Set Tolerance Value
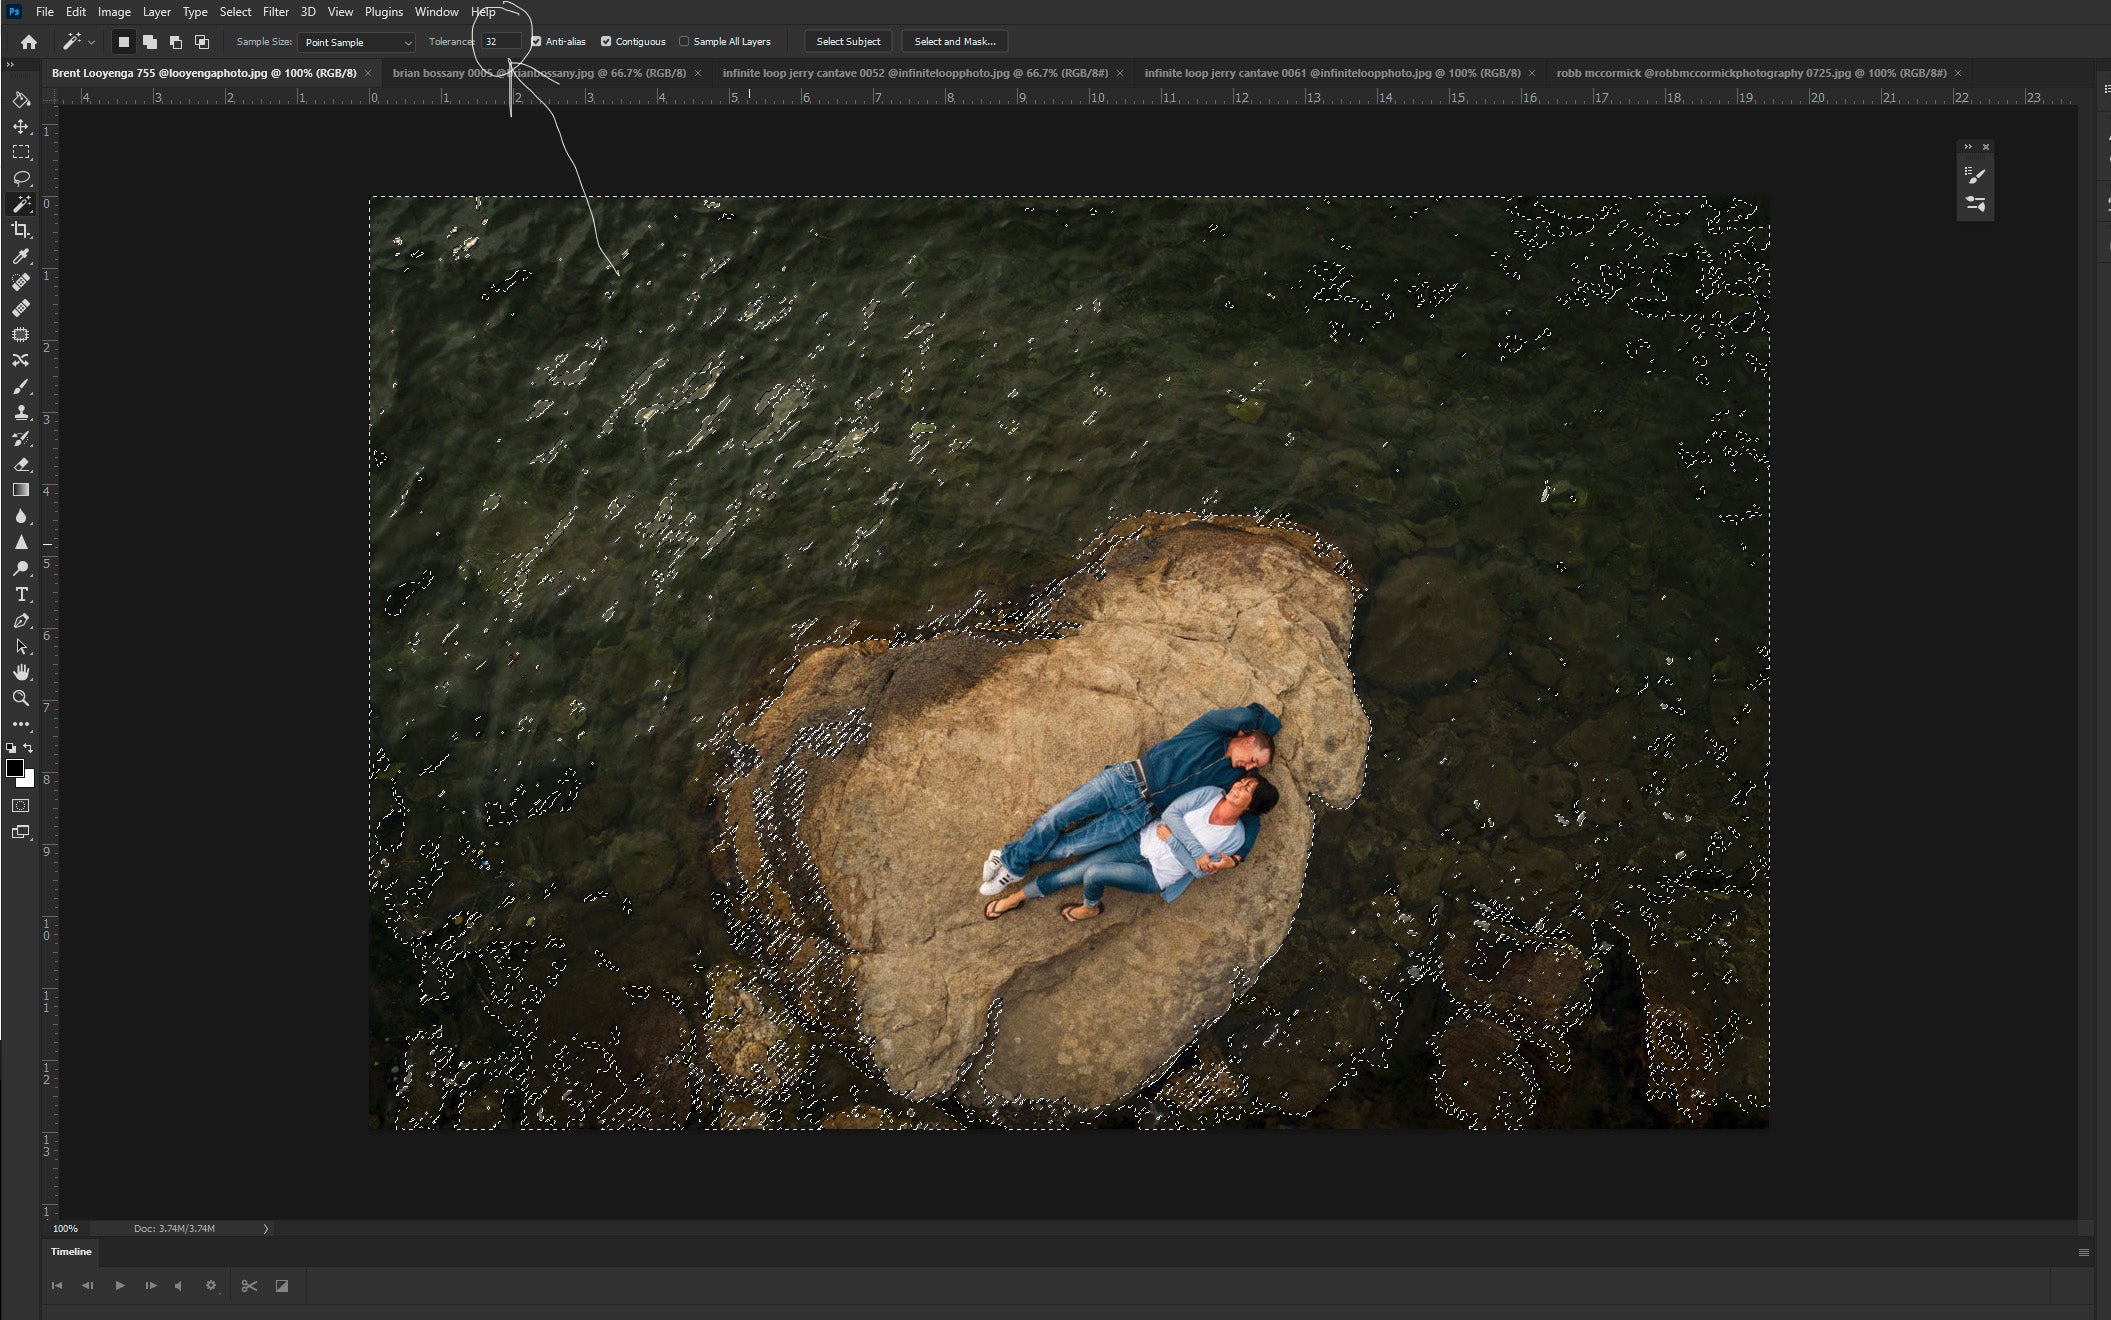
Image Courtesy: ShootDotEdit Customer @looyengaphoto
Again, at the top of the screen, go to Tolerance and set it to 25. This could be a good starting point for most images, but you can make more adjustments later if needed. The higher your Tolerance value, the more you will be able to select per click. Now, choose that area in your image you want to work on and click on it.
Related Read: Photoshop Shortcuts Library: Keyboard Keys For Windows & Mac
4. Refine Your Selection

Once you’ve made a selection, take a look at it and see if the entire area was selected as per your need. To fine-tune your selection, you could either increase the Tolerance and try selecting again or keep clicking the Magic Wand tool on the area you want to select. Since you already selected the Add to Selection mode, every time you click, the Magic Wand will add to your selection. You may even choose to use a little of both methods to get the best results for your image. In case you wrongly selected a portion, just click on the New Selection Mode button at the top of your screen. The icon would be just one white square. After this, you may try again with a lower Tolerance.
5. Begin Editing

When you’ve made your final selection, you may switch to any other tool of your choice to edit the part you had selected. From the top of your screen, you may choose Filters, and as long as your selection is active, every edit you make will be done inside of your selection, and the areas outside of it will remain unaffected. Once you’ve made the edits, you can enable the Magic Wand tool again and then, right-click inside of your selected area. From the drop-down menu that pops up, click Deselect. Now, any edits you make would either be global or confined to the new patch you select but won’t affect this particular part.
Further Read: How To Edit Portraits In Photoshop
Using the Magic Wand tool in Photoshop is easy, but the trick lies in knowing when to use it. This selection tool could be your go-to option when you want to make large selections, but, like we said before, it might not give you good results when working on grainy areas of your image. However, a little bit of practice could help you make the right judgment about when to swirl your magic wand! So keep experimenting and refining your photo editing skills for the tool to work its magic on your images. For more tutorials on various Lightroom and Photoshop tools, check out our Lightroom and Photoshop tips section.
At ShootDotEdit, we love sharing unique ideas and amazing tips to help you grow as a wedding photographer. We also offer professional photo editing services so that you can focus on your business and craft while we help you streamline your post-production workflow. To learn more about our services, check out our pricing plans.
Leave a comment