
Whether it’s the first look photographs or the father-daughter dance, as a wedding photographer, you are always on the lookout for all the special moments that make up a wedding. And not just that, you strive to get the perfect photo from every activity too! The result? Multiple photos of the same scene. And even after culling, you are still left with hundreds of photos in a similar setting that need to be edited in the same way but individually. This is where batch editing, also known as batch processing, comes into play. The batch editing feature in Photoshop allows you to apply a particular set of editing actions to a group of files with just a click – helping you save a lot of time in the post-production workflow. In this blog, we will walk you through the steps of how to batch edit in Photoshop to speed up your workflow.
What is Batch Editing?

Batch editing is an automated process that records the steps that you have taken to edit a particular photograph and saves them as an action that you can apply to other photos. In simpler words, it allows you to speed up your editing by helping you copy-paste the same editing actions from one image to several others. One of the perks of batch editing in Photoshop is that you can apply the edits to a batch of photos even without opening them.
When to Use the Batch Edit Feature?
The benefits of batch editing come with a word of caution. Even though it would be tempting to use the batch edit feature in Photoshop pretty often, it’s not a go-to solution for all images. This automated editing process should only be followed if you have a batch of image files photographed under the same setting, i.e., location and lighting setup. For example, specific wedding portraits, wedding dress detail photos, ceremony photos, etc. Moreover, if the pictures require complex editing – even though it is possible – it is recommended that you go through the files before applying the action to all of them.
How to Batch Process in Photoshop?
Listed below are a series of steps that will help you batch process several files in Photoshop.
1. Create a New Action & Record
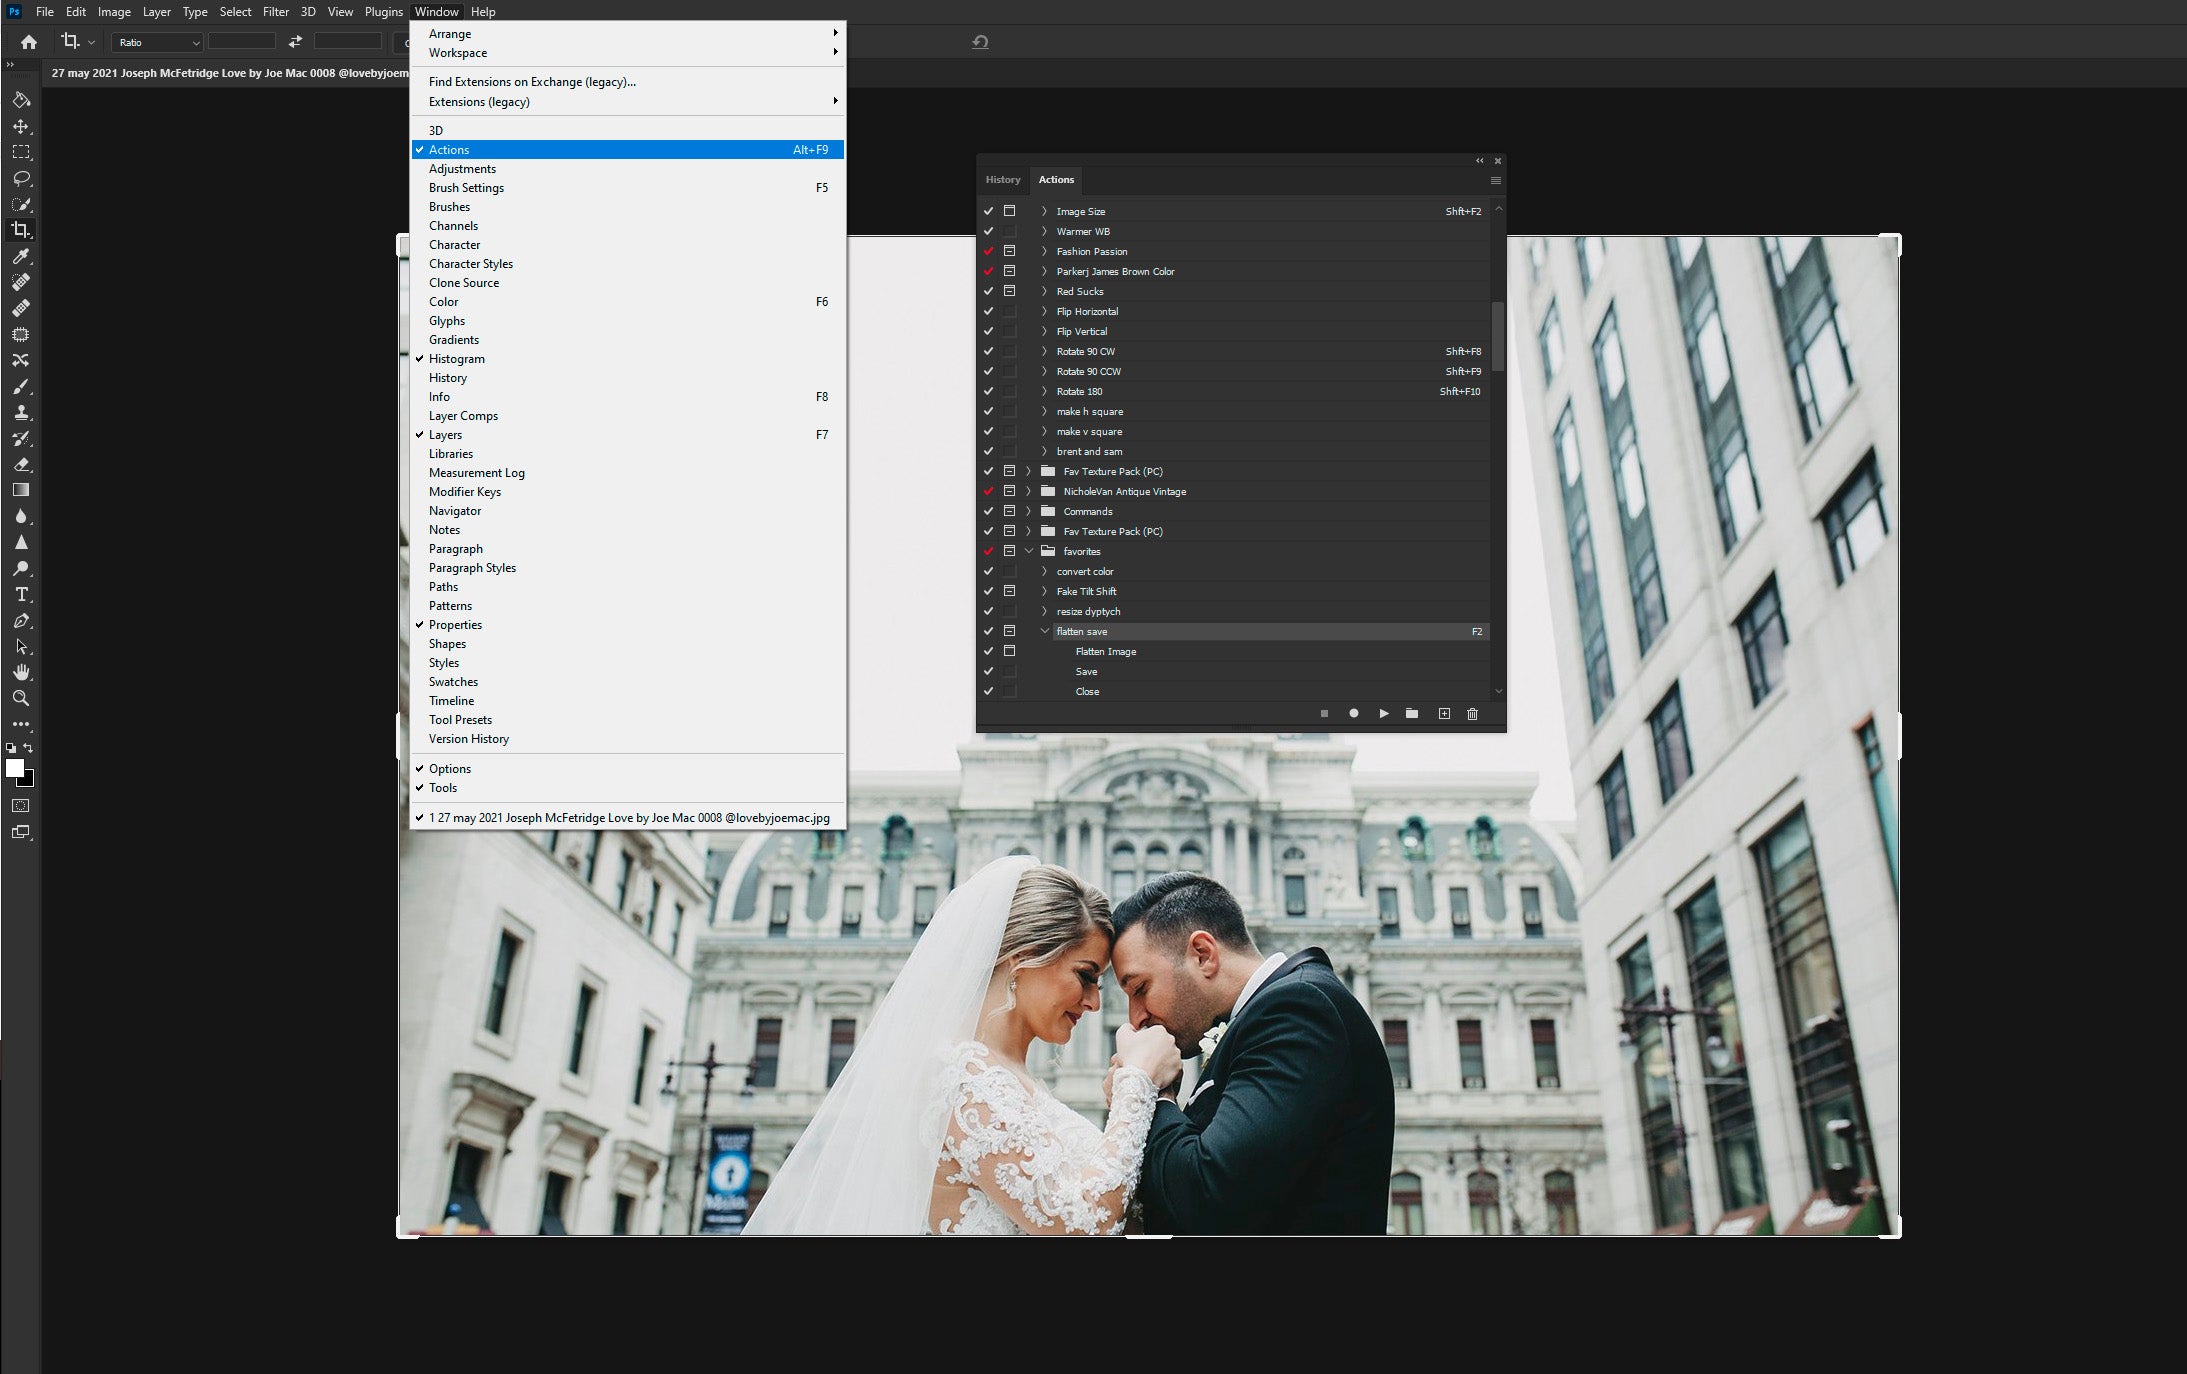
To start the batch-edit process, we need to create a new Action. To do this, open one of the images from the folder in Photoshop and then go to Window and check on Actions. A menu will pop up on the right-hand side of the screen. Click on the Actions tab and then click on the menu’s bar (a horizontal line) and select New Action. Then, name your action. If you want to assign a particular key as a shortcut to perform this action, you can do so by using the Function Key – and hit Record. Be descriptive while naming your action so that its function is clearly stated for future use. As you press record, notice that the red dot – placed for recording – will light up.
2. Start Editing
Now that you have hit the Record button, you can start editing the image – sharpening, cropping, color-correcting – whatever it is that the image requires. Note that post this point, every step that you take will be recorded as an action. So only make edits that you want to be applied to the other images in the folder as well.
Suggested Read: Top 10 Photo Edit Fixes Asked For By Brides
3. Stop Recording the Action
Once you have made all the adjustments you needed to make on the image, go to the Action panel and press on the stop icon (a square box next to the record button). This will stop recording your actions.
4. Apply Your Action to the Folder

For the final step of batch processing, all you need to do is run the action that you just recorded through the images in the folder. To do so, go to File, select Scripts, and then click on Image Processor. Then, as a new window pops up, click on Select Folder to choose the folder with the images you want to edit and then choose another folder to select the location to save the processed images. After that, go to the Preferences menu at the bottom and check the box for Run Action, then select Default Actions in the first drop-down menu, and, in the second box, choose the action you recorded and press Run. This will start batch processing for all the images in your selected folder.
Another way of doing this, if you already had the selected image files open, is to click on File, select Automate, and then select Batch. In the menu window that will pop up, go to Action and select the action that you just recorded from the drop-down menu. And make sure the Source is set to Opened Files (this will apply the action in only the opened files). Then, go to Destination and select the output you want for your edited images. There are three options under the drop-down menu. They are – None (the edited images will be left open in Photoshop), Save And Close (they will be saved and Photoshop will close), and Folder (they will be saved in a separate folder altogether). Once you have selected the Destination, click OK. As soon as you press OK, all the chosen action steps will run through all the photos you have opened.
Further Read: How To Remove Glass Glare From Photos In Photoshop

Batch editing in Photoshop is a great way to edit images faster. Like any other feature in Photoshop, getting the most out of it requires practice and some trial and error. While it may be tempting to use this feature often, you still have to be careful with it. In the quest to save more time, you might end up applying the same edit to a bunch of photographs that are not suited for that particular edit, which will just increase your post-production workload. For more post-production tips, explore our Lightroom and Photoshop section. If you found this blog helpful or have any questions, let us know in the comment section below.
At ShootDotEdit, we offer professional photo editing services to help ease your post-production workflow. To learn more about how we can help your wedding photography business, check out our pricing plans.
Leave a comment