
The Dodge and Burn tools have been popular among Photoshop users for a long time. Like some other tools and features in Photoshop, these tools have their roots in traditional film development. Photographers around the world had been using the dodging and burning technique to lighten or darken parts of their images much before digital photography was introduced. The effectiveness of this post-production technique is the reason behind its inclusion even in newer digital photo editing platforms. The Dodge tool helps you lighten selected areas of your image while the Burn tool darkens the chosen areas.
A Little Glimpse Into the History of Dodging & Burning
Back in the days when photo editing was done in labs, photographers dodged and burned their images manually. Photographers used their hands or cardboard sheets to prevent light from hitting specific areas of the photo as it was being exposed. The areas that did not receive light came out lighter in final prints. To darken or burn specific areas of a photo, photographers covered other areas with a cardboard sheet and left the selected area uncovered. This way light hit this area directly and ‘burned’ it. This part as a result came out darker in the final prints.
Related Read: How To Remove Glass Glare From Photos In Photoshop
Why Dodge & Burn

Besides simply lightening or darkening parts of your image, you can use the Dodge and Burn tools in Photoshop to do much more. Some other reasons you might want to dodge or burn your wedding photos can be—
- To create contrast in the photograph
- Lighten the highlights
- Darken shadows
- Enhance leading lines
- Draw attention to the focal point with a Vignette
- Create space through light or dark
How to Dodge & Burn Your Images In Photoshop
In our blog, we share 2 easy ways to dodge and burn using Photoshop.
NOTE: The first way (shared here) of dodging and burning parts of your photo might alter your image information and the effects are likely to be permanent. You might not be able to go back to your original image once you make the changes. For this reason, we suggest two initial steps:
- make a copy of the original image and then work from the copy
- create a new duplicate layer from the image for any dodge or burn changes you wish to make (go to Layer → Duplicate Layer).
1. Select Dodge or Burn Tool
Open Photoshop and go to the Dodge or Burn tool. You will find both of them in the Vertical Toolbar about halfway down, identified by an icon that looks like a lollipop. Choose the Dodge tool to lighten or brighten parts of your wedding photo. Select the Burn tool to darken areas of your image.
2. Select Brush & Set Options
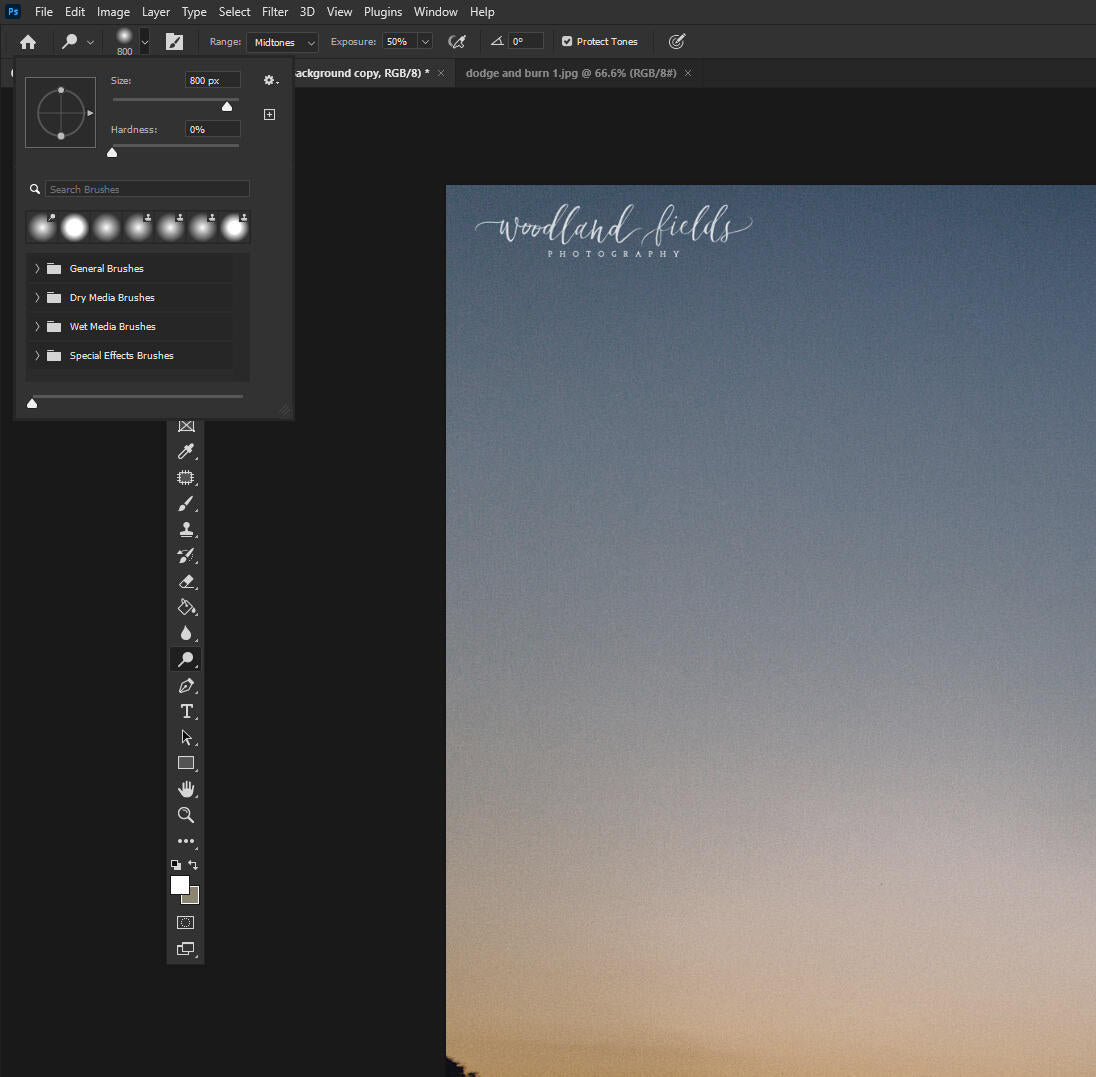
After selecting the dodge or the burn tool, next select brush tip options:
- Go to the Options Bar (second from the top underneath the standard file, edit, image, layer, etc., menu)
- In the Options Bar, find the brush size and select the arrow to drop down the next sub menu
- Select the size and hardness of the brush tip here
You can also alter the Range menu here. Select one of the following options from the Range menu:
- Midtones
- Shadows
- Highlights
The Midtones option changes the middle range of grays. The Shadows option changes the dark areas. The Highlights option makes changes to the light areas in your image.
Related Read: How To Install Brushes In Lightroom
3. Set Exposure & Select Airbrush
Once you make a brush and range selection, specify the exposure for the Dodge and Burn Photoshop tools. We suggest you keep the exposure as low as 5% in the beginning and gradually increase the exposure in increments until it meets your needs.
Next, enable the airbrush option to use your brush as an airbrush. This tool is in the same menu and is represented by the icon that looks like a quarter moon next to a pen. Enabling this option lets the changes you make flow and build-up just like a real airbrush would do.
4. Click Protect Tones & Begin Dodging or Burning
In the same top menu toolbar, checkmark the Protect Tones option to reduce the clipping in the highlights and the shadows. The protect tones option also prevents colors from shifting hue. You are now ready to drag your brush over the area of your photo that you want to work on.
PRO TIP: We suggest you use a brush size that is smaller than the area you want to work on. The dodging or burning effect might extend beyond the Brush Tip you use and a smaller tip will help you avoid going over the edges.
How to Dodge & Burn in Photoshop in a Non-Destructive Way
We already mentioned above that the first way of dodging or burning your image can be destructive. So if you want to avoid that, work in separate layers.
1. Add A New Layer & Change Mode to Overlay
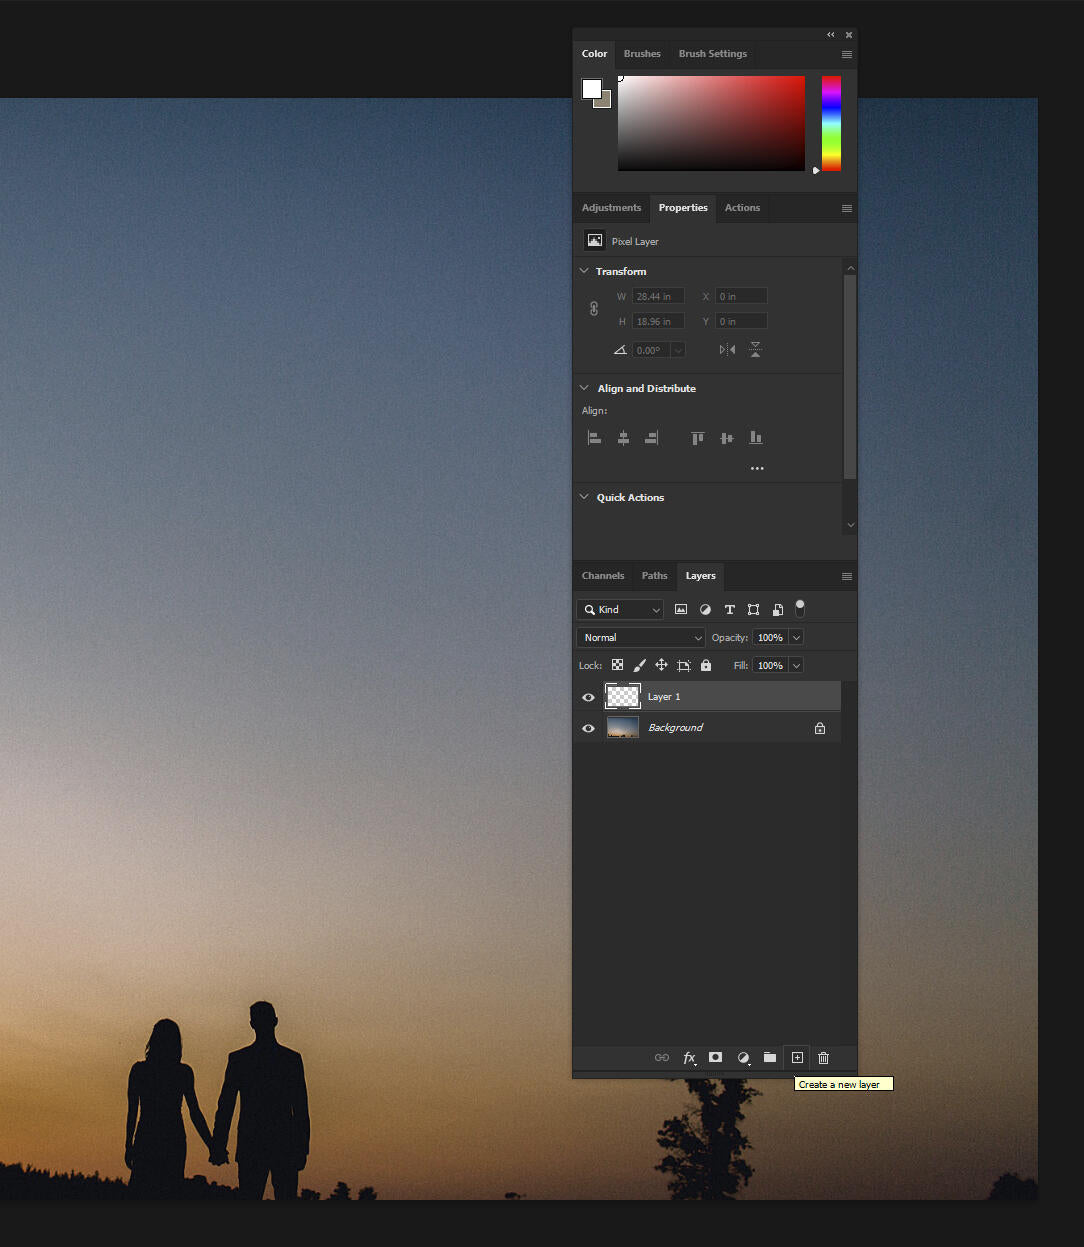
To dodge and burn your image in Photoshop in a non-destructive way, open it, and then create a new layer. You can do so by holding down your Alt key on PC or the Option key on Mac as you click on the New Layer icon. You will find the icon at the bottom of the Layers palette.
A New Layer dialog box will pop up. You can rename your layer through the dialog box.
The dialog box that pops up when you try adding a new layer will also give you an option of changing the Mode. The Mode here means Layer Blend Mode. The Mode is set to Normal by default. Change it to Overlay. The Overlay Blend Mode helps you boost the contrast of your photo.
Here are the steps in summary:
- Create New Layer
- Right Click New Layer
- Select Blending Options from the left-hand column
- Change Blend Mode to Overlay from Blend Mode dropdown menu
2. Select the Brush

Now that your new layer is ready for use you can move forward and select your brush. You will find the brush tool in the Tools Palette. Pressing B (default) on your keyboard will also help you access the brush tool. You will use the brush to paint over different areas of your chosen image. Painting on your image will result in dodging or burning particular areas of your image. Set the opacity of your brush to between 10-20% in the Options Bar at the top of your screen. You can increase it later according to your need.
3. Select White or Black & Start Painting
Set the paint “Foreground” color to white or black while using the brush tool. You will find this option in the tools palette – it looks like two squares of color partially overlayed (default is black and white). Once you click on this, you will see the Color Picker pop up. Use white to paint areas where you want to dodge your image, and black to start the burning process.
If you paint over some areas by mistake where you didn’t intend to, you can click on the color swatch to correct it. Keep trying until you get the desired results. By using this method, you will still have your original intact and you can keep making edits on new layers. You can merge the layers once you are done.
PRO TIP: By default (unless you have customized your keystrokes) you can press the left bracket key to make your brush tip smaller. The right bracket key will make it larger. To make the brush edges softer, press the Shift key with the left bracket key. Shift key with the right bracket key will make the edges of your brushes harder.
Here are the steps in summary:
- Select the Brush Tool (B)
- Change Brush opacity to 10-20%
- Choose either black or white as the “paint” color. White will lighten, black will darken
- Paint areas of the photo you want to darken or lighten
Final Thoughts
We hope our tips on the dodge and burn tools in Photoshop have helped you gain some new skills. We always defer to the experts on Photoshop and Lightroom at Adobe and have consulted their website to ensure that these tips match up!
At ShootDotEdit, we love sharing tips and tricks with you to help your wedding photography business grow. To learn more you can check out our Lightroom and Photoshop tips section. To find out about our professional post-production photo editing services you can take a look at our pricing plans.
Leave a comment