
While wedding photographers strive to generate picture-perfect photos in the raw and then import them into a post processing software to work on, it is not always possible to control how an image will turn out. Before concluding that a photo is ruined, consider using one of Lightroom’s features: Spot Removal. Below, we dive into how to use Spot Removal in Lightroom to salvage various types of eyesores in images.
How to Use Spot Removal in Lightroom
Lightroom Spot Removal is one of many features available for image editing. It is very useful for cleaning up certain portions of a wedding image and enhancing its overall look. Once you know how Spot Removal works, you will realize the endless options you have for fixing and retouching images.
If you have ever used Photoshop, you will notice the Spot Removal tool in Lightroom is very similar to the Clone Stamp and Healing Brush tools in Photoshop. Spot Removal offers both the option to clone or heal:
- Clone – Choose “clone” if you want to exactly replicate an area of your photo onto to the area to be fixed.
- Heal – Use “heal” if you Matches the texture, lighting, and shading of the sampled area to the selected area.
While both Lightroom and Photoshop give you the ability to remove spots, we’re going to focus on Lightroom in this article.

Reasons to Use Spot Removal
The Spot Removal tool comes in handy for modifying portions of an image whether large or small. This is a must-have tool for wedding photographers because you will often find yourself with great-looking photos that need to fixed before they are suitable for printing or giving to your clients as web images. Spot Removal is great for the following solutions to common photo editing issues:
- Eliminating unnecessary objects or people
- Fixing skin blemishes and imperfections
- Tidying up stray strands of hair
- Getting rid of distractions like tree branches and trash
- Wiping out lint, spots, and crumbs on clothing
- Removing specks created by dust on the camera sensor
How to Use Lightroom Spot Removal
Some photo fixes will be easier than others, and there are other artistic edits that can be made, such as blurring or adding bokeh to distract from issues. The good thing is Spot Removal affords you the features to get the job done whether simple or complex. The following steps show you how to use spot removal in Lightroom:
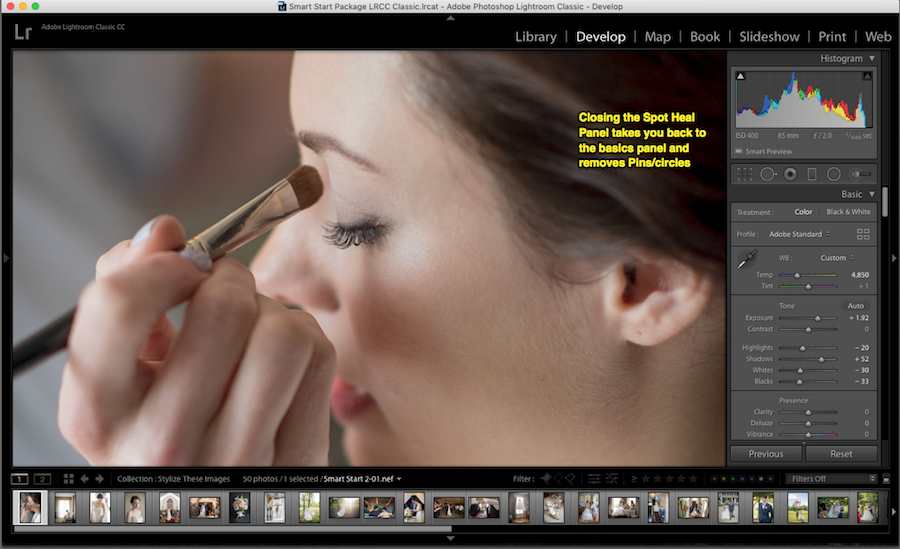
Step 1: Locate the Spot Removal Tool
While in Develop Module, locate the “Spot Removal” tool under the “Histogram” tab and click on it. Select “Heal” or “Clone” depending on what you need to fix.

Step 2: Choose Area to Correct
Place the cursor on top of the area to be altered and simply click and drag.

The white marquee that appears highlights your selection, whereas the white marquee with an arrow pointing from it highlights the sampled area to be cloned. Lightroom does a good job of selecting an adjacent area as a clone and automatically correcting minor imperfections.

Step 3: Make Adjustments
If you are not satisfied with how the image was corrected, you can undo them and make additional adjustments. Depending on your needs, you can do such things like increasing or decreasing the size of the “Spot Removal” tool by adjusting the “Size” slider.
You can also reset the tool and start over by creating a new selection. Adjust a selected area by manually dragging the handle. You can also reselect another area to clone and paint it until you are happy with the results.
Lightroom Spot Removal Shortcuts
When working in Lightroom, there is a long list of keyboard shortcuts that can make your workflow faster. Knowing a few actions you repeat frequently can save you more time than you’d imagine. To see an entire list of available shortcuts you can press Command + / (Mac) or Control + / (PC). Here are few commonly used keyboards shortcuts for both Mac and PC you can use for spot fixes:
- Access Spot Removal tool – Press “Q”
- Select Clone and Heal – Press “Shift” + “Q”
- Create Circular Spot – Press “Command” and drag (Mac); Control-drag (PC)
- Create Circle Spot Sized from the Center – Press “Command” + “Option” and drag (Mac); “Control” + “Alt” and drag (PC)
- Create Circle Spot Scaled from Anchor – Press “Command” + “Shift” and drag (Mac); “Control” + “Shift” and drag (PC)
- Select New Source – Press “Backslash (/)”
- Hide Interface – Press “H”
- Delete a Spot – Press “Option” and click (Mac); “Alt” and click (PC)
- Delete a Batch of Spots – Press “Option” and click (Mac); “Alt” and click (PC)
- Select Visualize Spots Option – Press “A”
Tackling Tough Spots
For hard to tackle fixes, you may need to resort to more advanced Spot Removal tool settings and techniques. Sometimes, the imperfections may not be readily noticeable until you get a large print back from your printing company. Knowing how to use spot removal in Lightroom to uncover these hidden disasters is vital.
The Visual Spots option in the Spot Removal tool is one that might be easily overlooked if you do not know what it does just by looking at it. When chosen, it actually inverts the image creating a black and white outline. Change the contrast by adjusting the Visual Spots slider to ensure you can see all of the imperfections. From skin bumps to dirt, you will be amazed to see the things that pop up on the screen that need fixing. Simply do the fixes as you normally would before clicking out of the Visual Spots mode.
While not all photos may not turn out as expected, knowing how to use Spot Removal in Lightroom allows you to spare those that might otherwise seem to be unusable. Spot removal can be tricky without a lot of practice. When you become more comfortable with the Spot Removal tool, it will become a part of your workflow and help save you time. The more you know about editing in Lightroom, the faster your workflow will be.
Discover additional ways to maximize Lightroom in your workflow with our Online Training: Advanced Lightroom Skillsets. Throughout the Online Training, expert Jared Platt focuses on how to use Lightroom and its features to create a fast and streamlined workflow.
Leave a comment