
GIFs, and creating GIFs, used to be wildly popular back in the 90s, but they lost their appeal somewhere late in that decade. In recent years, with the growth of social media platforms, the art of creating and sharing GIFs has made a huge comeback. People across the world use animated GIFs for memes and funny short clips. They are used to express emotions online. Wedding photographers are making full use of GIFs to share with their clients as well as add interest to their websites.
In this blog post, you will learn how wedding photographers can take advantage of creating GIFs to impress their clients. And, bonus, we’ll share how wedding photographers can also use GIFS on their own websites to add interest and diversity above and beyond the normal text/image layouts!
Why Create GIFs?
Creating GIFs for wedding photography has gained popularity in the last few years. There are wedding photographers who charge extra for GIF animation wedding photography. There is no doubt that GIF photos add realism, depth, and beauty to the image. There are couples who specifically look for photographers who would be able to provide them GIFs of their wedding photos. Not many couples might demand an all-GIF wedding, but several would love a few GIFs for their personal use as a part of their photography package.
Photo Editing Software for Creating GIFs
Adobe Photoshop is a great platform to create animated GIFs. Wedding photographers who already use Photoshop or are learning it can create interesting wedding GIFs in a few easy steps. Want more tips and tricks for wowing your clients? Read TOP 15 PHOTOSHOP TRICKS FOR WEDDING PHOTOGRAPHY here!
7 Easy Steps for Creating GIFs in Adobe Photoshop
- Upload Your Wedding Photographs to Photoshop
- Open up the Timeline Window
- Create Frame Animation
- Create a New Layer for Each New Frame
- Make Frames From Layers
- Choose Number of Loops
- Save and Export GIFs
Wedding GIF animations have taken over the internet and can be seen everywhere, from social media sites to websites to blogs. As a wedding photographer, creating GIFS can add value for your clients and also for you to use on your websites, social media, and blog. If you’re interested in learning how to create GIFS using Photoshop, then start here!
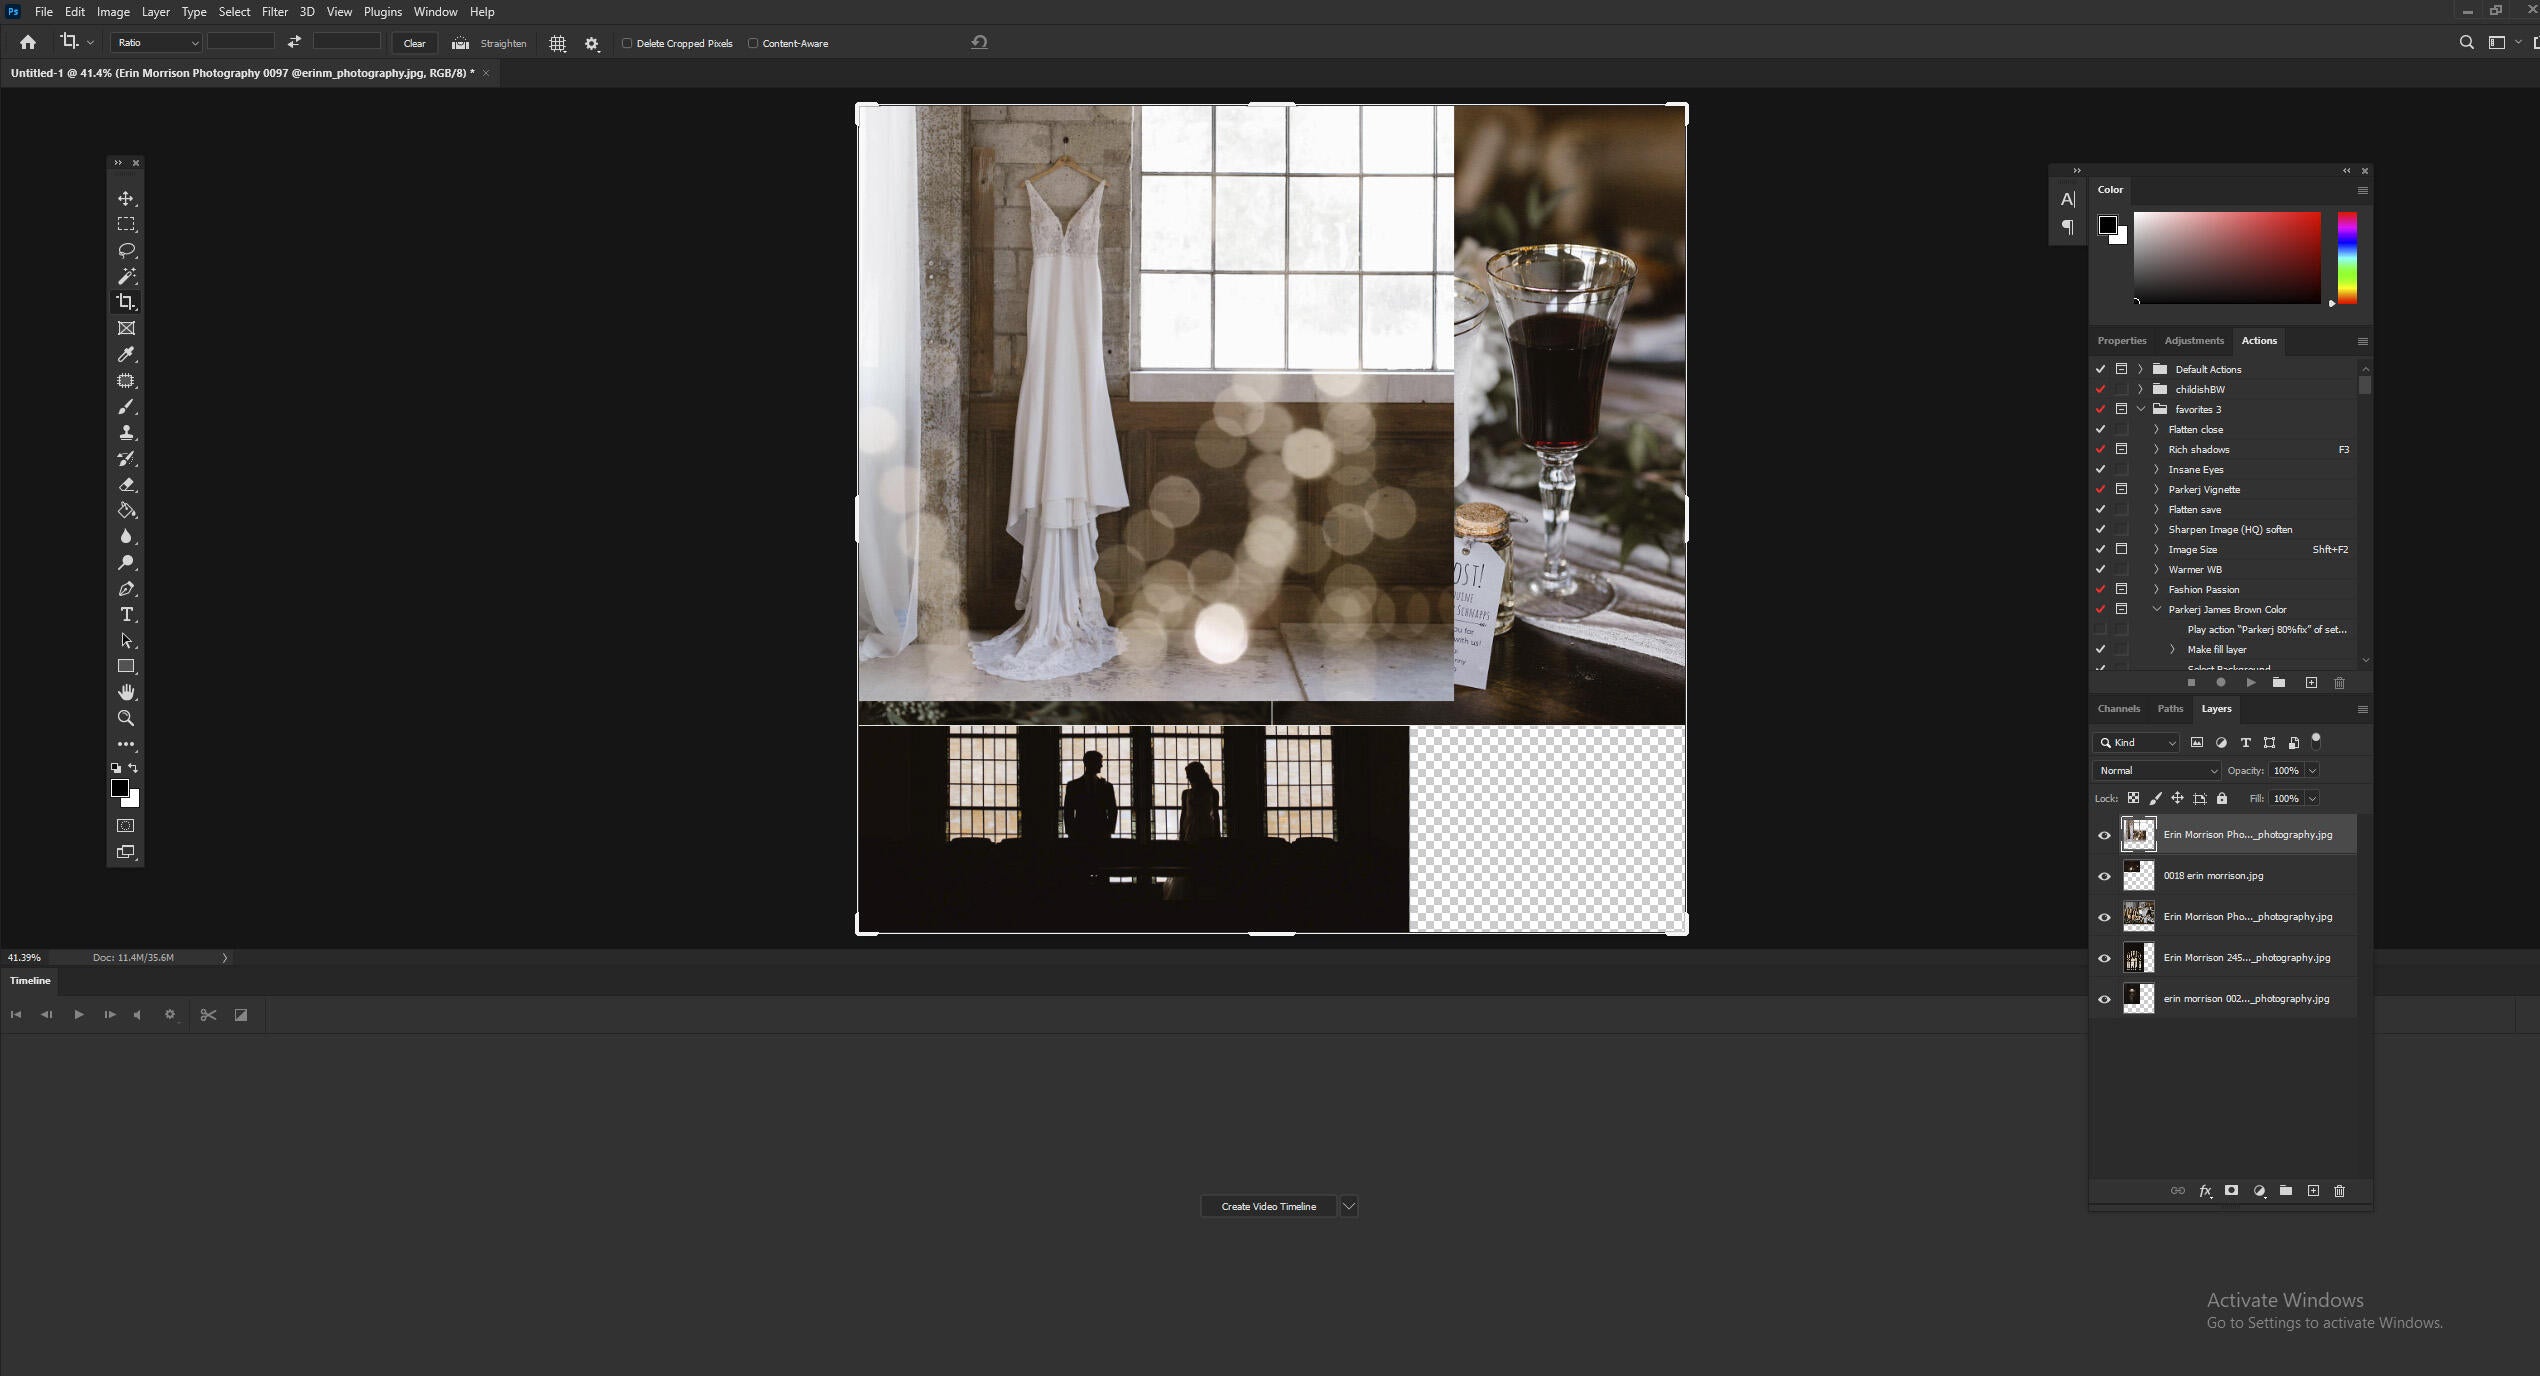
1. Upload the Wedding Photographs to Photoshop

If you already have images you want to use for creating GIFs, then gather the images you want in a separate folder. To upload them into Photoshop, click File > Scripts > Load Files Into Stack. Then, select Browse, and choose which files you would like to use for creating GIFs. Then, click OK.
Photoshop will then create a separate layer for each image you have selected. Once you’ve done that, skip to step 2. If you don’t already have the series of images created then create each frame of the animated GIF as a different Photoshop layer. To add a new layer, choose Layer > New > Layer.
Be sure to name your layers so that you can keep a track of them easily when you are creating GIFs. To name a layer, go to the Layer panel on the bottom right of your screen. Now double-click on the default layer name, and type in the name you want to change it to. Press Enter when you’re finished.
Once you have your layers in there and you’ve named them all, you’re ready for Step 2.
QUICK TIP: If you want to combine layers so they appear in a single frame in your GIF, turn visibility on for the layers you want to merge. You can do so by clicking on the ‘eye’ to the left of each layer name so only the eyes for the layers you want to merge are open. Next, press Shift + Command + Option + E (Mac) or Shift + Ctrl + Alt + E (Windows). Photoshop will create a new layer containing the merged content, which you should also rename.
2. Open up the Timeline Window
To open the Timeline, go to the top navigation, choose Window > Timeline. The Timeline will let you turn different layers on and off for different periods of time, thereby turning your static image into a GIF.
The Timeline window will appear at the bottom of your screen.
3. Create Frame Animation
In the Timeline window, click “Create Frame Animation.” If it’s not automatically selected, choose it from the dropdown menu. Be sure to actually click it, otherwise, the frame animation options won’t show up.
4. Create a New Layer for Each New Frame

To do this, first select all your layers by going to the top navigation menu and choosing Select > All Layers. Then, click the menu icon on the right of the Timeline screen. From the dropdown menu that appears, choose— ‘Create new layer for each new frame.’
5. Make Frames From Layers

Open the same menu icon on the right, and choose ‘Make Frames From Layers.’ This will make each layer a frame of your GIF. Under each frame, select how long it should appear for before switching to the next frame. To do this, click the time below each frame and choose how long you’d like it to appear.
6. Choose Number of Loops
At the bottom of the toolbar, select how many times you’d like it to loop. The default will say Once, but you can loop it as many times as you want, including Forever. Click Other if you’d like to specify a custom number of repetitions.
7. After Creating GIFs, Save and Export

Preview your GIF by pressing the play icon. Now, save and export your GIF. Save it to use online by going to the top navigation bar and clicking File > Export > Save for Web (Legacy).
Next, choose the type of GIF file you’d like to save it as under the Preset dropdown. If you have a GIF with gradients, choose Dithered GIFs to prevent color banding. If your image employs a lot of solid colors, you may opt for no dither.
The number next to the GIF file determines how large (and how precise) the GIF colors will be compared to the original JPGs or PNGs. A higher dithering percentage translates to the appearance of more colors and detail but it increases the file size.
Click Save at the bottom to save the file to your computer. Now you’re ready to upload this GIF wherever you wish to.
Quick Tip: After creating GIFs you may need to resize your GIF. A maximum of 500 pixels for the height and width is a good ballpark range in order to make it compatible across different platforms.
For more great tips on creating GIFs, read: How to Optimize an Animated Gif: 10 Ways. You can also check out this post: How do you speed up or slow down an animated GIF in photoshop?
Get Ready to Impress by Creating GIFs
Congratulations! Now you know how to create a GIF from the gorgeous wedding photos of your couples. Once you’ve created the GIF animation, upload it online. It should play seamlessly. These GIFs will not only please your present clients but also impress your past ones. Creating GIFs will make you stand out among other wedding photographers as well as other vendors. And creating GIFsmay attract new ideal wedding clients So get ready to rock!
Once you are done learning about creating GIFs, keep honing your skills with this blog post: TOP 10 PHOTO EDIT FIXES ASKED FOR BY BRIDES.
Leave a comment