
Adobe Lightroom is popular software, beloved by wedding photographers for its cataloging and organization features. Yet not everything in Lightroom is as easy as Adobe makes it seem, especially when it comes knowing how to add text to your images. Here at ShootDotEdit, we provide photo color correction services for professional photographers. We also share wedding photo editing tips, such as the reasons you need to add text in Lightroom and how to do it. Keep reading to learn more about adding text to photos in Lightroom.
Add Text in Lightroom
You might be asking, “Can you add text in Lightroom?” The answer is yes and there are a variety of reasons you may want to learn how to add text in Lightroom. Some wedding photographers like to add metadata directly onto a photo before posting it online.
Some clients want to add descriptions or titles to their photos for identification. Many photographers add watermarks and identity plates temporarily to photos to ensure clients do not use photos they do not pay for.
Some of the most common reasons to use the Lightroom add text features include:
- Include a photo caption
- Add metadata to a photo
- Label a photo
- Add a watermark or identity plate to a photo
For example, we added text over images to create our article on the best photography quotes.
Tips to Add Text in Lightroom
Just like you want to have your style chosen for options in Lightroom, such as batch editing your wedding photos, try to have an idea of the text you want to add to each photo before you begin setting up your text. There are several modules and many steps you will need to follow to add text in Lightroom for various reasons.
It would be unfortunate to get halfway through the process only to decide you have no idea what type of text you want to add to your photos. A consistent process for your images can also speed up the time it takes you to add text to your wedding images.
Sometimes Lightroom wants you to add text to your photos as you import them into the software (such as with metadata tags), but other times you will need to add your text later in the process (usually before exporting images to other platforms). Stay organized by keeping a list of the data and text you want to add to each photo. This can be a regular part of your post-wedding workflow so you follow the same steps each time (and become as fast as possible, while also maintaining accuracy and efficiency).
Add a Photo Caption, Label, or Metadata
Before you can begin adding captions, labels, or metadata directly to your wedding photos, you must add this information into the metadata tool in the software. To add text to photo in Lightroom, specifically metadata, use the following steps:
Step 1: Open up the library module and find the photo you want to work with. Once you find it, select the photo.

Step 2: Your metadata panel should appear. Scroll down until you see the title field in the metadata panel.

Step 3: Enter your desired title or text into this field.

Sometimes photographers choose to add text to their photos because they want to use the photos in a Lightroom collage or slideshow. If you want to use your text in a slideshow, simply repeat steps 1-3 for all the photos you want to appear in your slideshow and then:
Step 4 & 5: Enter slideshow mode and click the ABC button.

Step 6: Click the “custom text” button (to the right of the ABC button) and change this to “title.”

Your text should now appear underneath your photo in the slide. You can manipulate the text by changing the color and font via the text overlay panel.
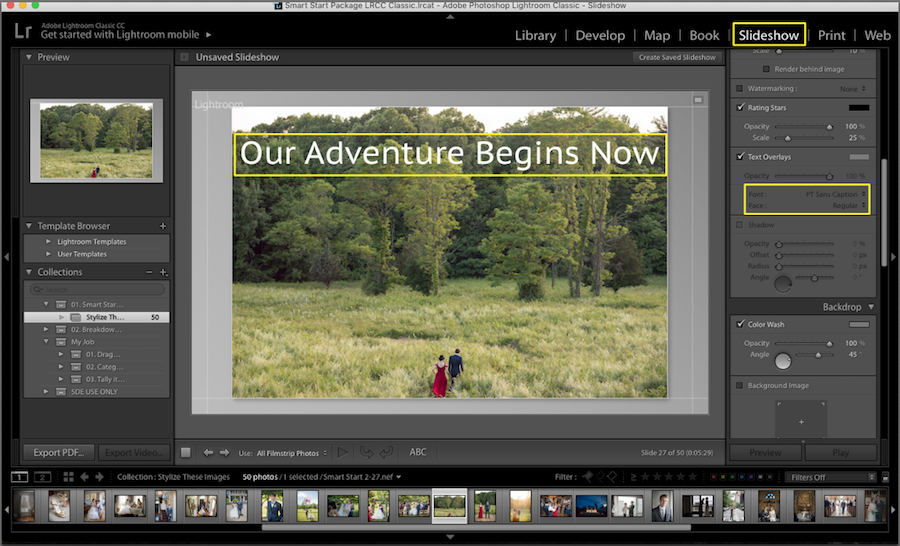
Just make sure the text box is active before you try to change your text settings. With any text added to your wedding photos that clients can see, make sure it matches your overall brand and style. Even text on your images should point back to your unique photography style so clients know what to expect from you.
Add a Watermark or Identity Plate
Another way you can add text to your photos in Lightroom is to add a watermark or identity plate. Adding watermarks and identity plates to images is slightly easier than adding other types of text to photos in Lightroom.
Follow the steps below to add a watermark to a photo:
Step 1: Enter any module in Lightroom.
Step 2: Choose Lightroom and then edit watermark (depending on your version of Lightroom).

Step 3: Choose whether you want a text or graphic watermark. Since this is a tutorial on adding text, we will talk only about text here.

Step 4: Type your desired text into the field.

Step 5 & 6: Choose your font, text color, and alignment. In the same screen, choose your watermark’s opacity, size, inset, and anchor placement.

If you do not want to cover your wedding photo and simply want to add an identity plate to it, take the following steps:
Step 1: Enter the print module.

Step 2: Click “identity plate preview.”
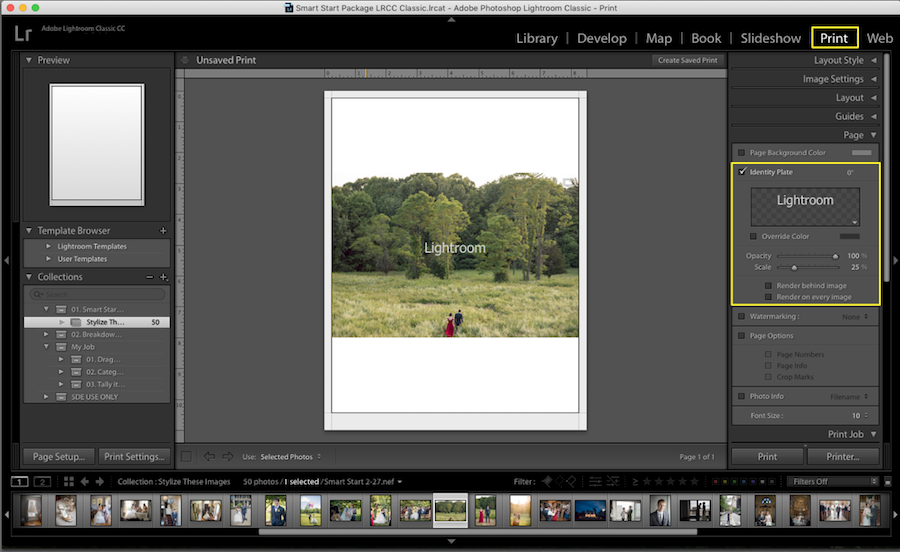
Step 3: When the menu pops up, click “edit.”

Step 4: Choose “Use A Styled Text Identity Plate” to make a textual identity plate.

Step 5: Save your identity plate to insert in your wedding photos later.

If you want to add text in Lightroom, luckily it is a relatively painless process. The only downside is that there is a multitude of steps involved and your post-wedding workflow is likely long enough. That is why outsourcing your wedding photo edit needs to a photo editor service, like ShootDotEdit, is helpful to take care of the majority of the work for you so adding text Lightroom is one of the only adjustment you need to make.
Find out additional ways to speed up your post-wedding workflow with Lightroom when you read our blog on Advanced Lightroom Tips with Jared Platt.
Leave a comment